Spring Nail Designs
20 Bold Cowgirl Nail Designs to Rock Your Western Style
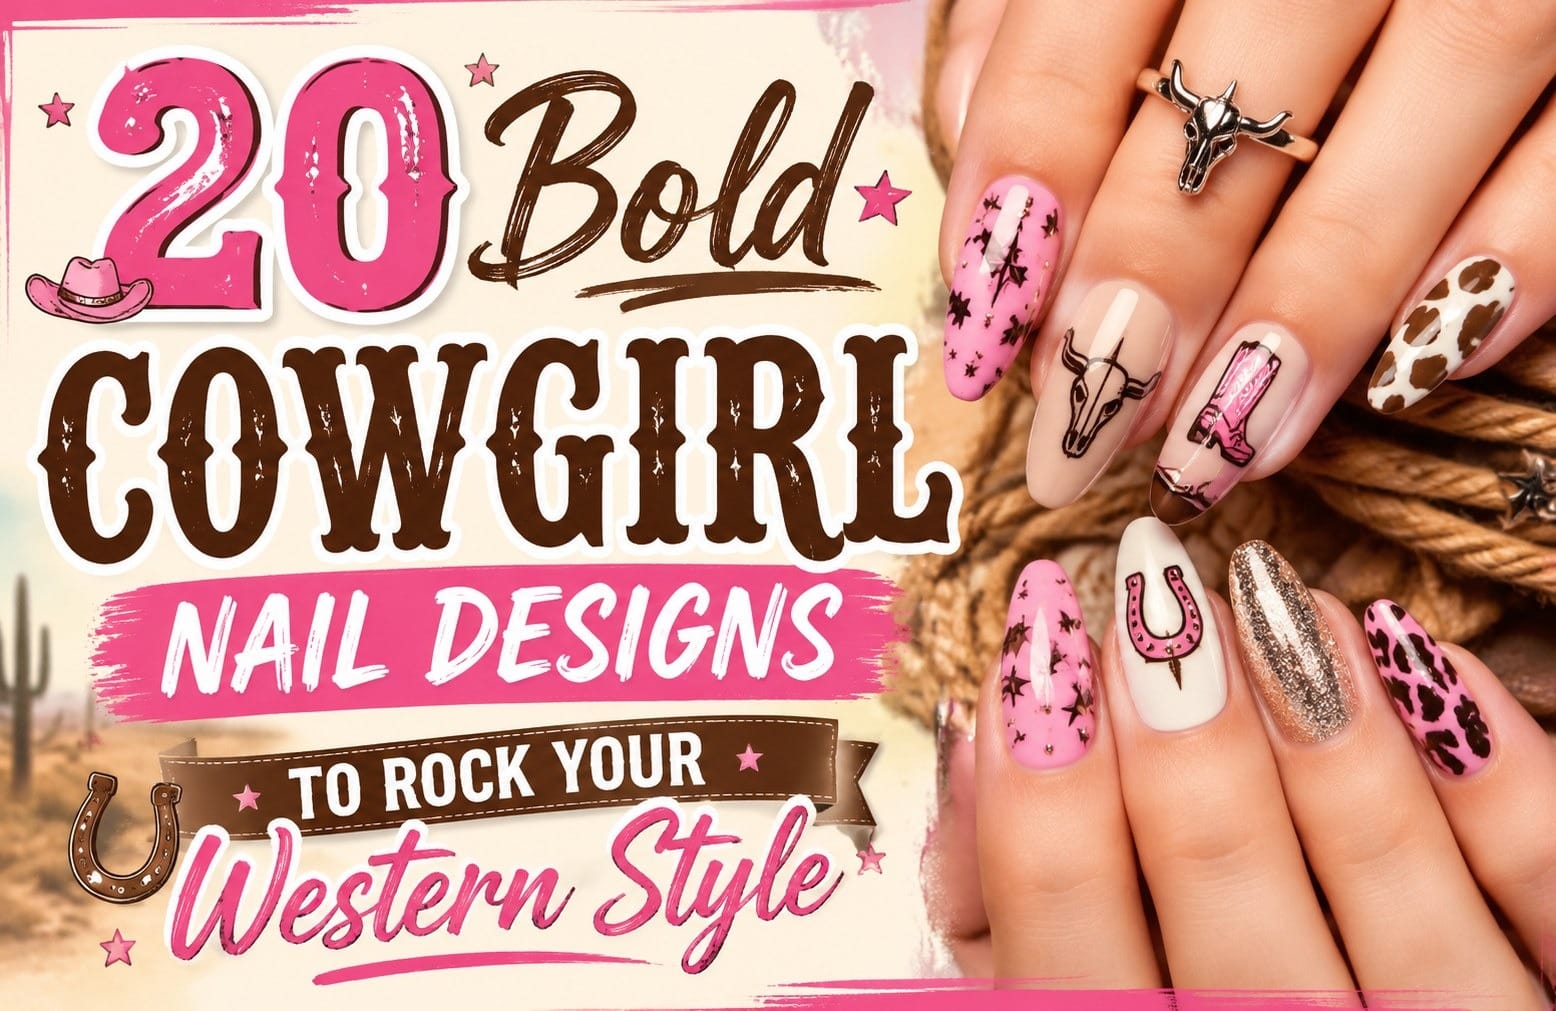
Introduction to Cowgirl Nail Designs: Bringing the West to Your Fingertips
When I first discovered the magic of cowgirl nail designs, I was attending a country music festival, and I noticed how beautifully the Western aesthetic translated into nail art. The bold colors, the intricate patterns, and the confidence they radiated absolutely captivated me.
Cowgirl nail designs represent far more than just a trend—they’re a celebration of Western culture, independence, and bold personal style. These designs blend traditional Western elements like horseshoes, fringe, leather textures, and earthy tones with modern nail art techniques to create something truly spectacular.
The beauty of cowgirl nail art lies in its versatility. From the moment you decide to explore these Western nail design ideas, you’ll realize they can range from subtle and sophisticated to completely bold and eye-catching. Some designs whisper elegance with delicate gold accents and neutral backgrounds, while others shout confidence with vibrant reds, turquoise, and statement-making patterns.
Why Cowgirl Nail Designs Are Having a Major Cultural Moment
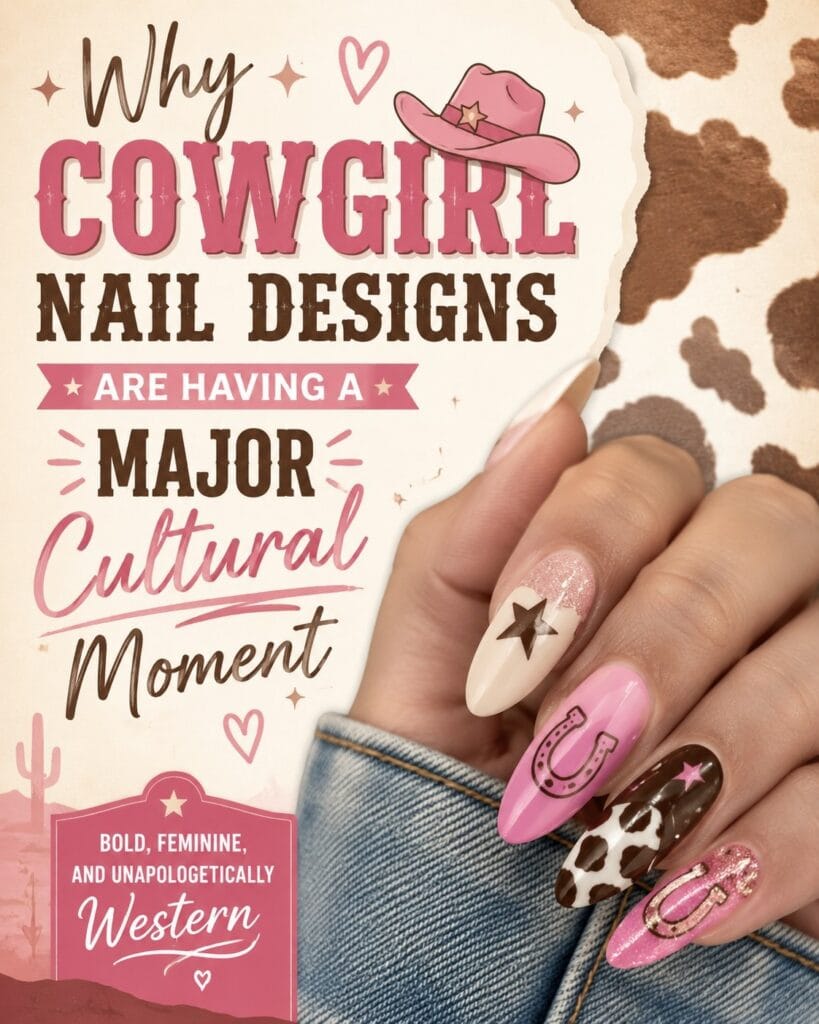
The resurgence of cowgirl nail designs isn’t random—it’s part of a broader Western fashion renaissance we’re witnessing right now. Let me share what I’ve observed in the nail art community over the past few years.
First, there’s the undeniable influence of country music culture becoming more mainstream and celebrated. Artists like Morgan Wallen, Zach Bryan, and Maren Morris have reignited interest in Western aesthetics, and this naturally flows into every aspect of fashion, including nail art. When people connect emotionally with country music and the lifestyle it represents, they want to express that identity through their appearance.
Second, Western wear has transcended its traditional boundaries. It’s no longer confined to ranches and honky-tonks. Today, you’ll see Western-inspired fashion on runways, in street style blogs, and at music festivals worldwide. Cowgirl nail designs are the perfect complement to this aesthetic trend, offering a way to complete your Western look from head to toe—or rather, from head to fingertips.
Third, the nail art community itself has become more sophisticated and inventive. Nail technicians have access to better products, more advanced techniques, and greater creative freedom. This means cowgirl nail designs have evolved from simple horse-themed patterns to intricate, gallery-worthy pieces of wearable art.
From my experience working with clients and exploring nail art forums, I’ve noticed that people are drawn to cowgirl designs because they allow for self-expression. You’re not just choosing a manicure; you’re making a statement about your personality, your interests, and your style philosophy.
Essential Tools and Products for Creating Stunning Cowgirl Nail Designs
Before diving into the specific designs, let me share the tools and products that have made a significant difference in my nail art journey. Whether you’re planning to create Western nail designs at home or visiting a professional salon, understanding these essentials will help you appreciate the craftsmanship involved.
Base Products
- Quality Base Coat: This is non-negotiable. A good base coat protects your natural nails and helps your polish adhere better. I recommend looking for ridge-filling formulas that create a smooth canvas for your designs.
- Nail Polish in Multiple Finishes: You’ll want creamy finishes, glitters, metallics, and matte options to create layered, dimensional cowgirl nail designs.
- Top Coat: Invest in a quality top coat that provides both shine and durability. Some designs require thick gel top coats for protection.
Specialized Tools
- Detail Brushes: Thin, precise brushes are essential for creating fine lines and intricate patterns in Western nail designs.
- Dotting Tools: Multiple sizes help create perfect dots, rhinestone placement guides, and stippled textures.
- Striping Tape: This makes creating clean geometric patterns and fringe details much easier.
- Nail Stamper and Plates: Stamping sets designed for Western themes can save time and create consistent patterns.
Embellishments
- Rhinestones: Crystal and metallic rhinestones in various sizes add sparkle to cowgirl nail designs.
- Metallic Foil: Gold, silver, and copper foils create luxe Western nail design elements.
- Dried Flowers: Real dried flowers or nail art flowers add organic texture to designs.
- Nail Charms: Horseshoe, boot, and Western-themed charms elevate simple designs.
Color Palettes That Define Authentic Cowgirl Nail Designs
One of the most critical aspects of creating successful cowgirl nail designs is understanding Western color psychology. The colors you choose set the entire tone and authenticity of your design.
Classic Western Palette
The traditional cowgirl nail designs often feature:
- Deep Reds: Reminiscent of saddles, barns, and sunset skies. Red is the heart of Western aesthetics.
- Rich Browns: Leather browns, chocolate, and tan tones create earthy sophistication.
- Cream and Off-White: Neutral bases that let other colors shine in Western nail design combinations.
- Black: Essential for outlines, contrast, and dramatic modern cowgirl nail designs.
Turquoise & Southwestern Influence
This palette has become increasingly popular in modern cowgirl nail designs:
- Turquoise: The standout color that immediately signals Southwestern Western style.
- Coral and Rust: Complementary warm tones that work beautifully with turquoise.
- Navy Blue: Adds depth and sophistication to turquoise-based cowgirl nail designs.
- Gold Accents: The perfect metallic partner for this color family.
Sunset Collection
Inspired by actual Western sunsets, this palette creates romantic cowgirl nail designs:
- Orange: Warm, inviting, and quintessentially Western.
- Pink and Mauve: The softer side of cowgirl nail designs, perfect for those who prefer elegance over boldness.
- Purple: Often used in sunset designs, it adds mystery and depth.
- Gold and Yellow: Highlights that mimic actual sunset rays.
Modern Minimalist Western
For contemporary takes on cowgirl nail designs:
- Nude Bases: Skin-tone and beige neutrals that make details pop.
- Metallic Accents: Silver or rose gold for subtle Western sophistication.
- Matte Black: For clean lines and geometric Western nail design elements.
- Single Pop Color: One accent nail in bold red or turquoise in otherwise neutral designs.
20 Bold Cowgirl Nail Designs to Rock Your Western Style
Now, let’s explore the actual designs. These 20 cowgirl nail designs range from beginner-friendly to advanced, from everyday wear to special occasion showstoppers.
1. Classic Red Barn Cowgirl Nail Designs
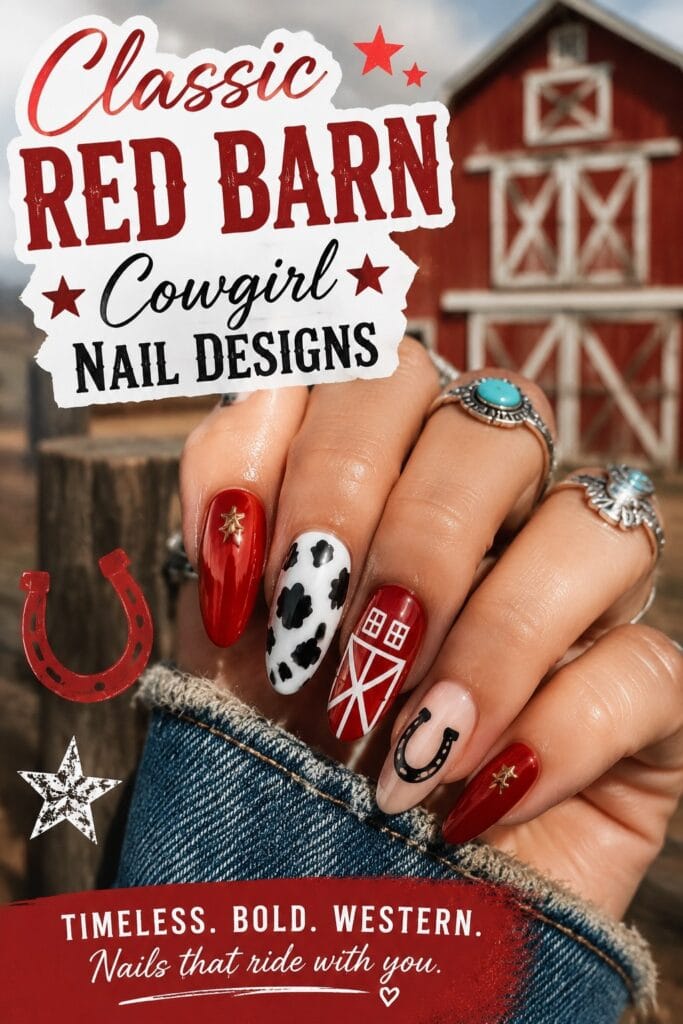
This is the quintessential cowgirl nail design that never goes out of style. Start with a cream or off-white base on all nails. On your accent nail—typically the ring finger—create a simple barn silhouette using black polish and a detail brush. Fill the barn with deep red polish, leaving the white base visible as the sky. Add tiny black dots for windows and a black roof. Finish with a matte top coat for that authentic rustic feel.
Why it works: This design immediately identifies itself as Western nail art. The simplicity makes it accessible for beginners while maintaining sophisticated aesthetics. The color combination feels authentic to the actual Western landscape.
2. Turquoise Dream Cowgirl Nail Designs with Gold Accents
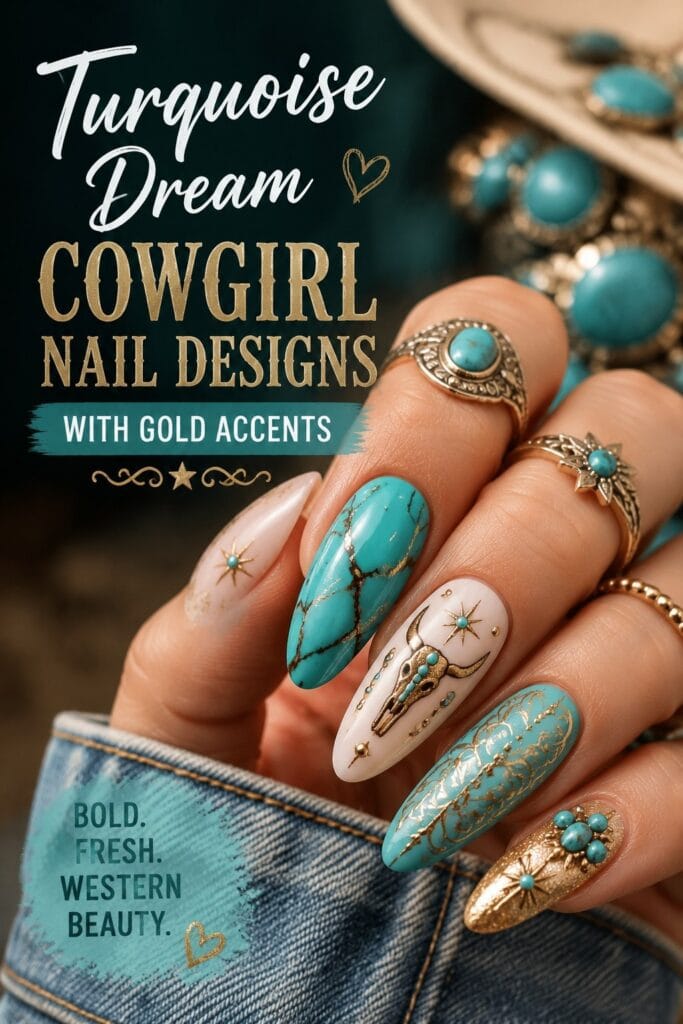
Apply a soft cream base to all nails. Using a thin brush, create delicate feather shapes on two accent nails using turquoise polish. Once dry, add fine gold lines through the feathers to create a dreamcatcher effect. On the remaining nails, apply small turquoise dots in clusters, then dot the center of each with gold polish using a dotting tool. This creates a scattered jewelry-inspired pattern. Seal everything with a glossy top coat.
Why it works: The turquoise and gold combination is universally flattering and screams a luxury cowgirl aesthetic. The feather design ties to both Western and bohemian influences, making it current and relevant.
3. Fringe and Tassel Western Nail Designs
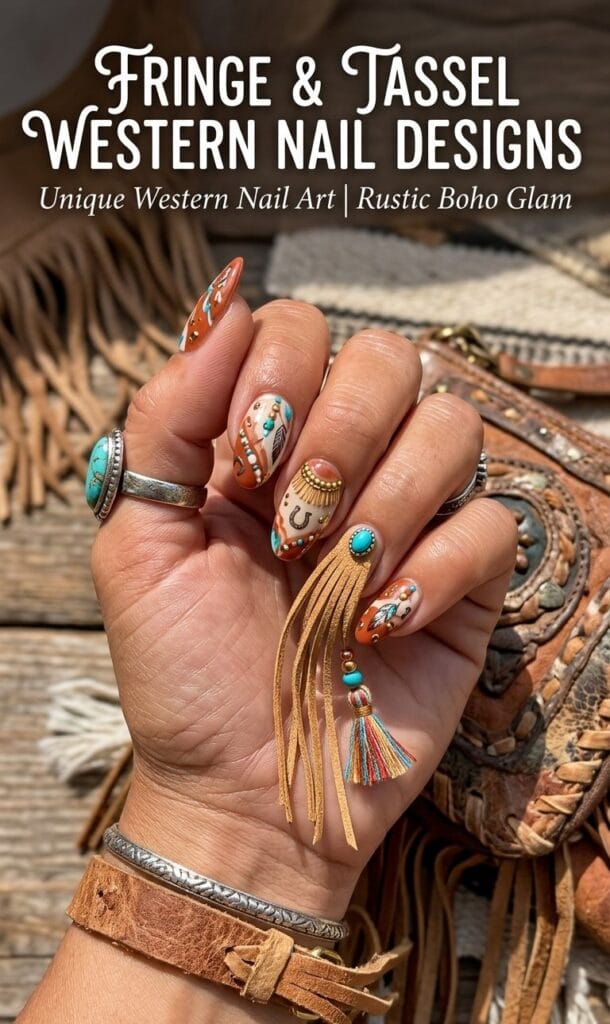
Create this by applying a nude or tan base color. Using a striping brush or fine detail brush, create thin vertical lines in gold or rose gold metallic polish on two accent nails, spacing them about 1mm apart. These represent fringe. On one nail, add small metallic beads or rhinestones at the base of the fringe lines to create a tassel effect. This design celebrates one of the most iconic Western fashion elements—fringe—in miniature form on your nails.
Why it works: Fringe is fundamentally Western, instantly recognizable. The metallic treatment keeps it modern. This cowgirl nail design works on both short and long nails.
4. Horseshoe Lucky Charm Design
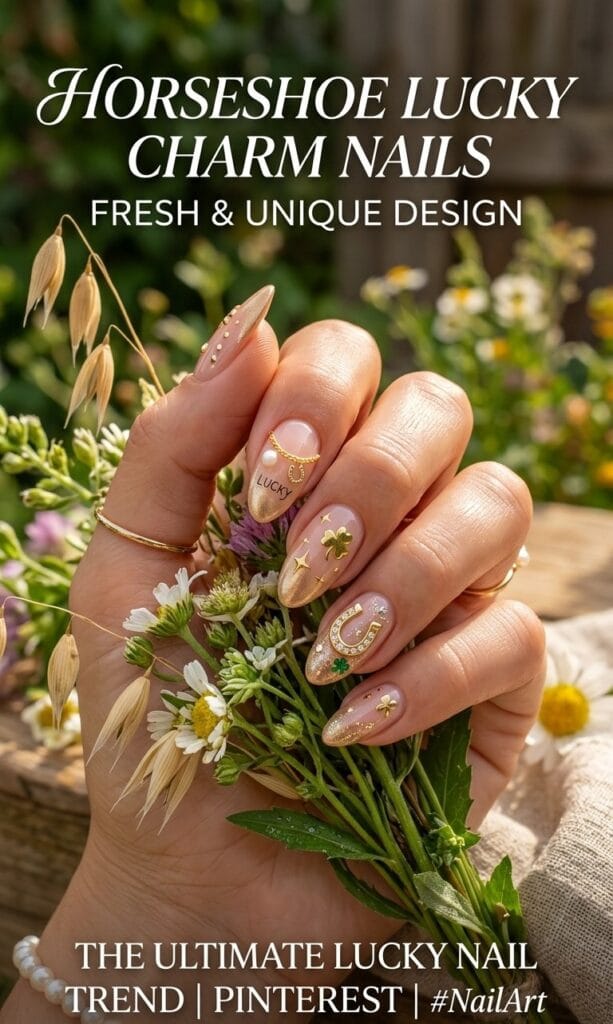
Paint all nails with a chocolate brown base. Using white polish and a thin brush, paint horseshoe shapes on three accent nails, positioning them off-center for an authentic, haphazard cowgirl nail design look. Add tiny white dots around the horseshoes as sparkles or luck indicators. For extra impact, place tiny gold rhinestones along the horseshoe curves. The remaining nails can have simple gold or white accent stripes.
Why it works: Horseshoes are iconic Western symbols. White on brown creates a striking contrast. This cowgirl nail design tells a story of luck and good fortune, which resonates emotionally with viewers.
5. Sunset Ombre Cowgirl Nail Designs
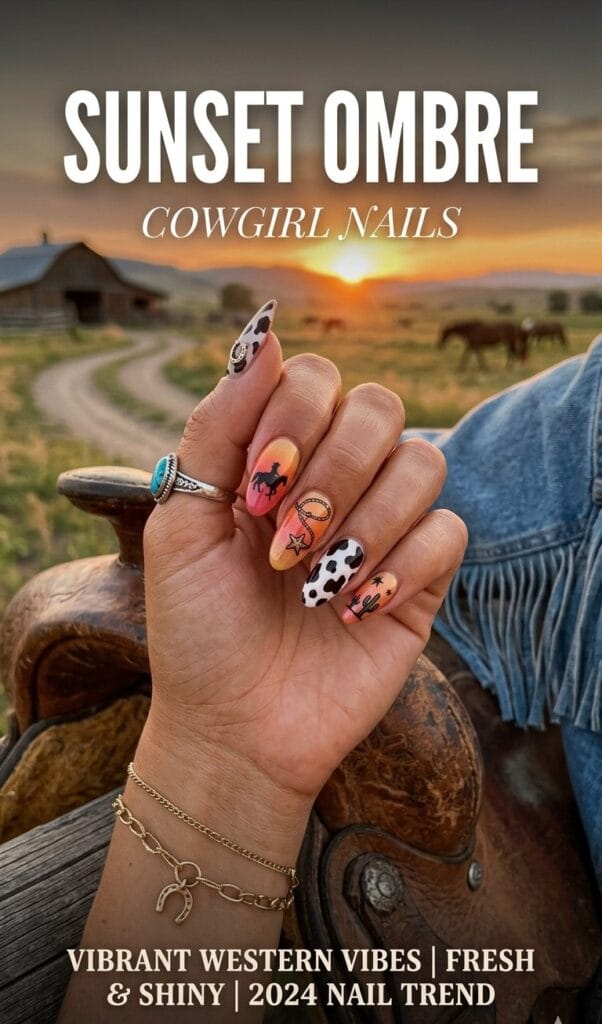
This technique requires a gradient. Using a makeup sponge, create an ombre effect from orange (base) through pink to pale yellow or white (tip) on all nails. Once set, add silhouette details: small black cattle or horses in the “middle distance” of each nail, creating depth. Add tiny cacti or desert brushes in black along the base. This cowgirl nail design captures literal Western landscape beauty.
Why it works: Sunset colors are universally appealing. The silhouette technique adds sophistication. This design works beautifully on longer nails where you have more canvas space.
6. Leather Texture Cowgirl Nail Designs
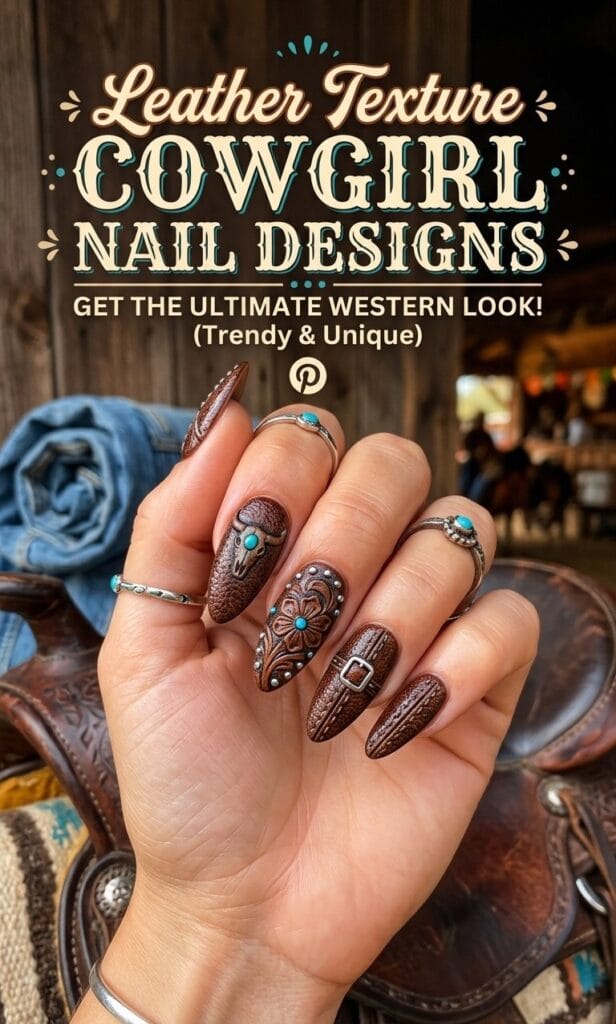
Apply a rich burgundy or deep tan base. Using a specialty texture polish or creating texture with a toothpick dipped in slightly thickened polish, create a leather-like crackle or embossed pattern. The texture should look like actual leather from a saddle or cowboy boots. Add tiny buckle shapes in gold or silver metallic polish. This tactile cowgirl nail design celebrates the material culture of Western fashion.
Why it works: Texture adds dimension and makes these cowgirl nail designs unique. Leather is fundamentally Western, appearing in boots, saddles, belts, and jackets.
7. Western Boot Print Pattern
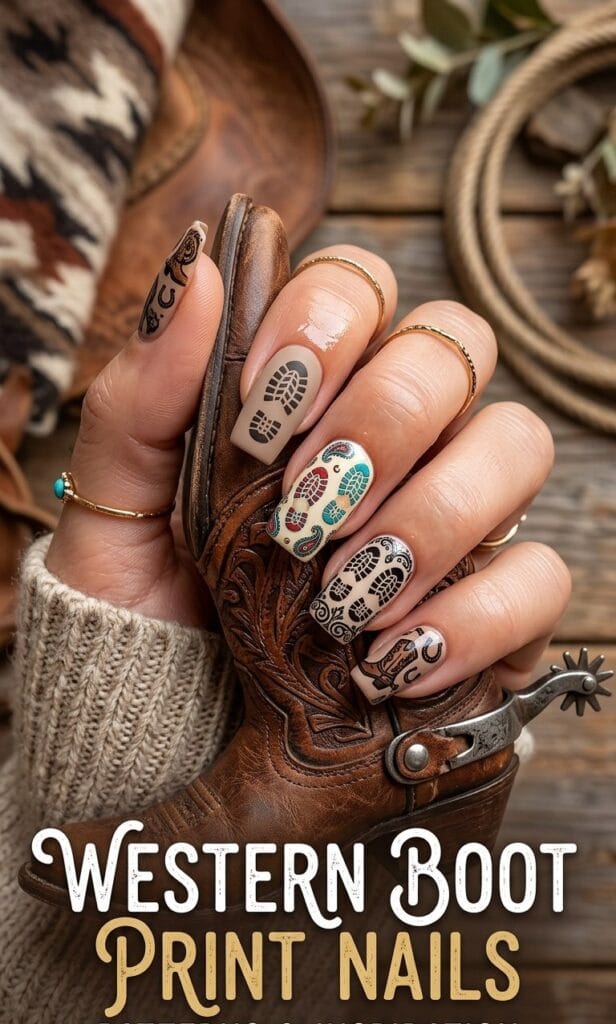
Create a nude or light tan base on all nails. Using a thin brush and dark brown polish, paint tiny boot silhouettes in various directions on each nail—some pointing up, some sideways, creating a scattered pattern. Add tiny spur details to the boot heels. Some boots can have turquoise accents to break up the browns. This fun cowgirl nail design celebrates iconic Western footwear.
Why it works: Boots are immediately recognizable as Western. The scattered pattern creates visual interest without being overwhelming. This design works across all nail lengths.
8. Turquoise and Coral Western Geometric Design
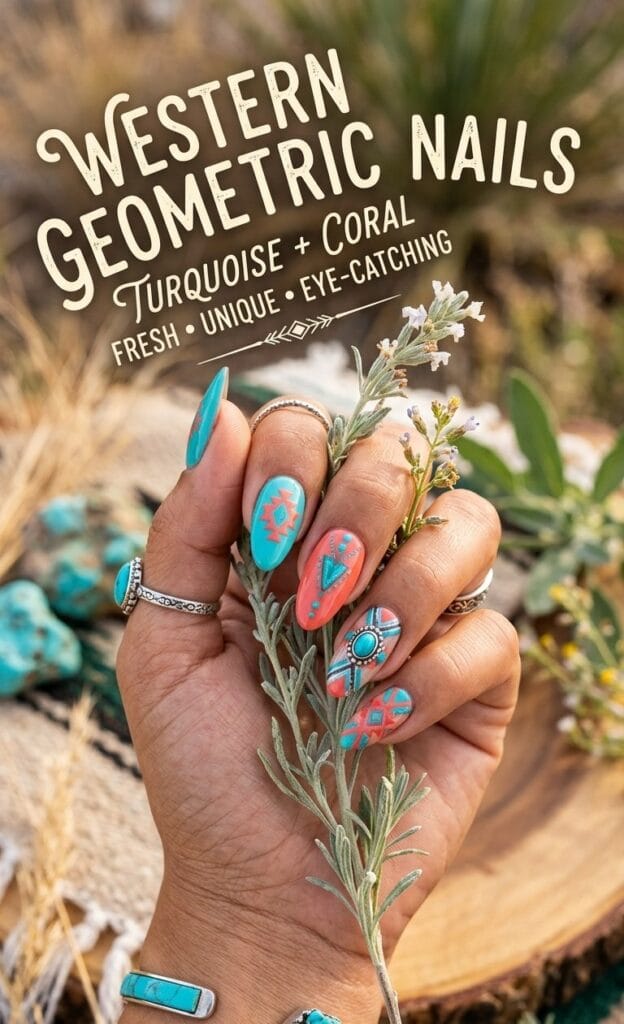
Apply a white base. Using a thin brush and masking tape, create geometric shapes—triangles, diamonds, and lines—using turquoise polish. In the negative space, add coral details. Add gold metallic accents along the geometric edges. This modern cowgirl nail design blends traditional Western colors with contemporary geometric aesthetics.
Why it works: Geometric patterns appeal to those who like modern art. Turquoise and coral are on-trend color combinations. This cowgirl nail design feels fresh, not dated.
9. Rhinestone Statement Cowgirl Nail Designs
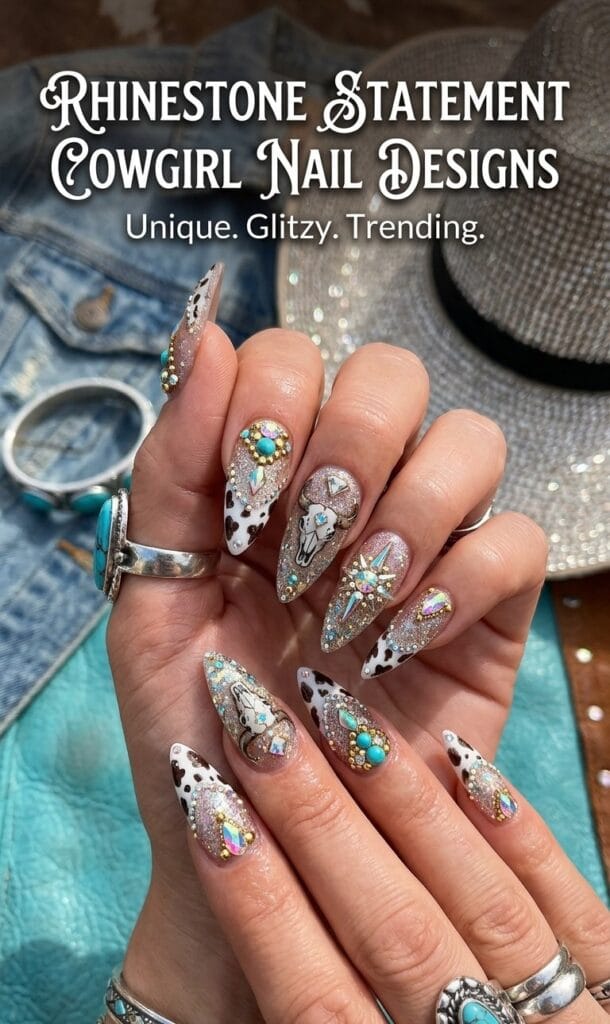
Create a deep red base on all nails. Using clear gel or a jewelry-grade adhesive, place increasingly larger rhinestones in a gradient pattern from the nail bed toward the tip, creating a stunning cascade effect. The rhinestones should be in clear, gold, and occasionally turquoise varieties to catch light differently. Seal with a thick gel top coat. These luxe cowgirl nail designs make bold statements.
Why it works: Rhinestones photograph beautifully for Pinterest. They catch light and create a visual dimension. This design works especially well for special occasions. It’s unapologetically bold, which aligns with cowgirl aesthetics.
10. Cactus and Desert Cowgirl Nail Designs
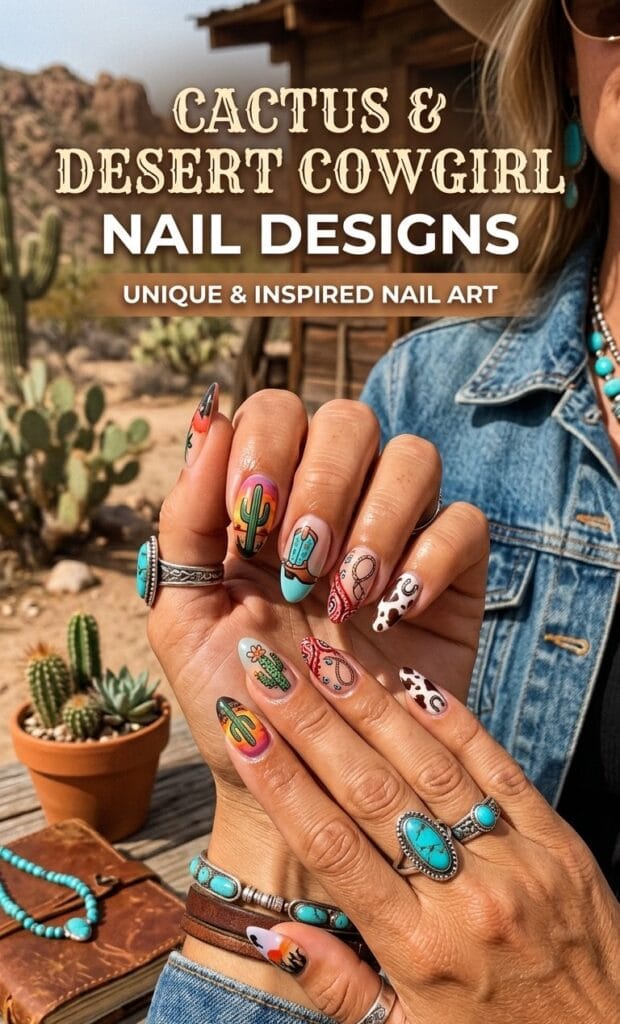
Paint a soft peachy or sandy base. Using dark green polish and a thin brush, paint simple cactus shapes on two accent nails—saguaro cacti with small barrel cacti clustered nearby. Add tiny pink or magenta flowers blooming from the cacti. Use tan or brown to add small rocks or desert ground details. This whimsical cowgirl nail design celebrates the Southwestern desert landscape.
Why it works: Cacti are trendy beyond just Western aesthetics. The addition of colorful flowers adds femininity to the rugged Western theme. This cowgirl nail design appeals to those with a bohemian Western style.
11. Gold Leaf and Burgundy Cowgirl Nail Designs
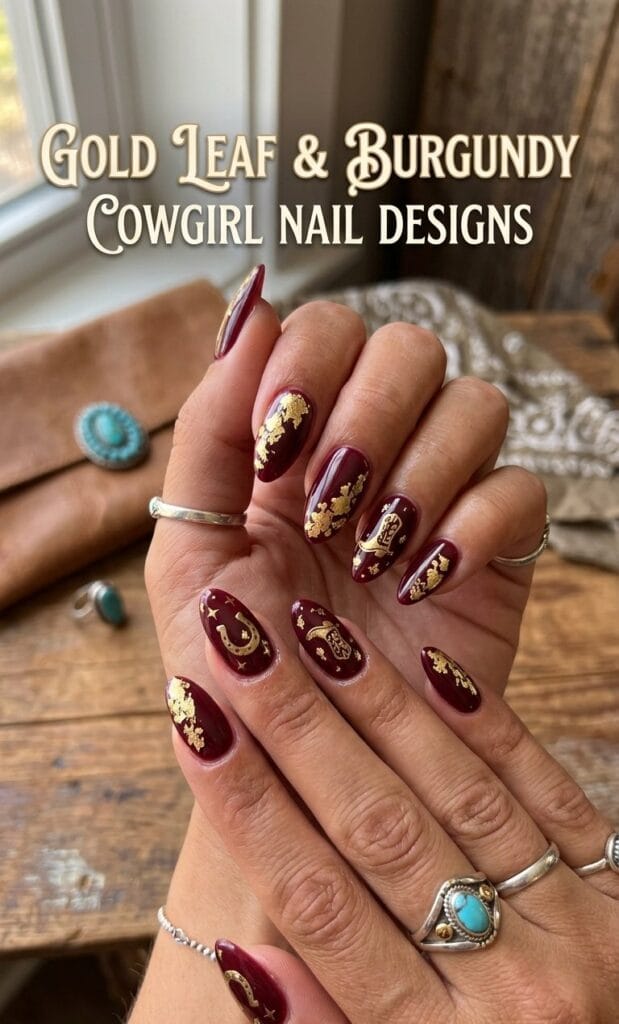
Apply a deep burgundy base to all nails. While still slightly tacky, apply small pieces of gold leaf randomly across the nail surface, pressing gently to adhere. The gold creates an organic, luxurious, scattered pattern. Once set, add subtle black outline details or small Western motifs using a thin brush. This elegant cowgirl nail design exudes sophistication.
Why it works: Gold leaf creates a luxury aesthetic. Burgundy and gold is a classic, elegant Western combination. This cowgirl nail design works for both casual and formal occasions.
12. Cowboy Hat and Boot Combo Design
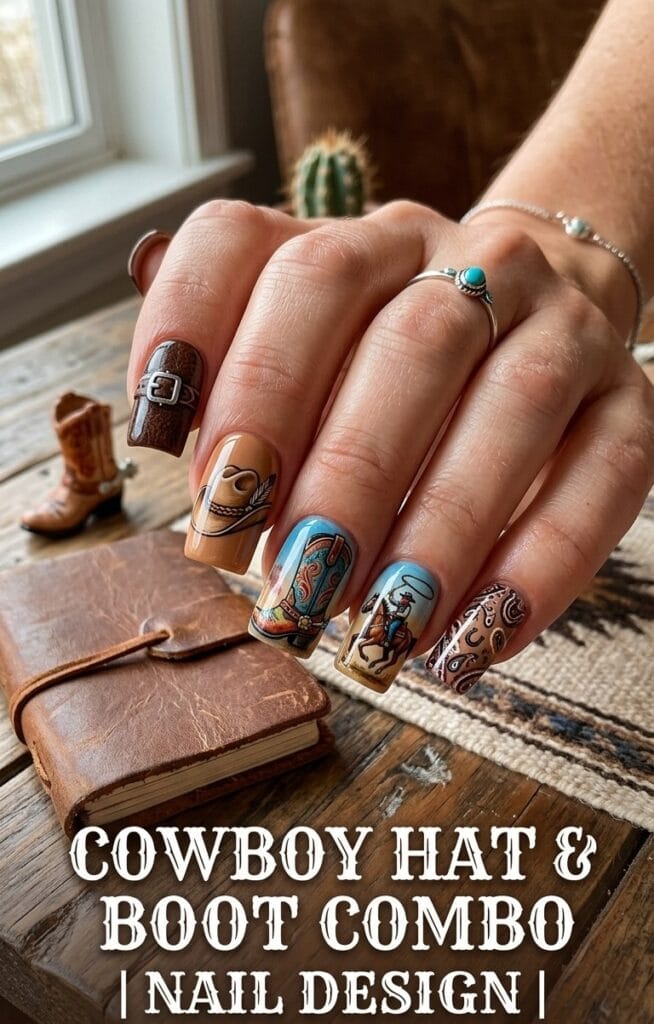
On a cream base, create a simple cowboy hat silhouette on one accent nail using black and tan polish—add a gold band around the crown. On another accent nail, paint a cowboy boot using brown polish with a black outline, and add a spur detail in silver. The remaining nails feature thin horizontal stripes in coordinating colors. This literal Western nail design is playful and unmistakably cowgirl.
Why it works: These are iconic Western symbols immediately recognizable as cowgirl nail designs. The combination of two symbols creates a complete Western narrative.
13. Fringe Ombre Cowgirl Nail Designs
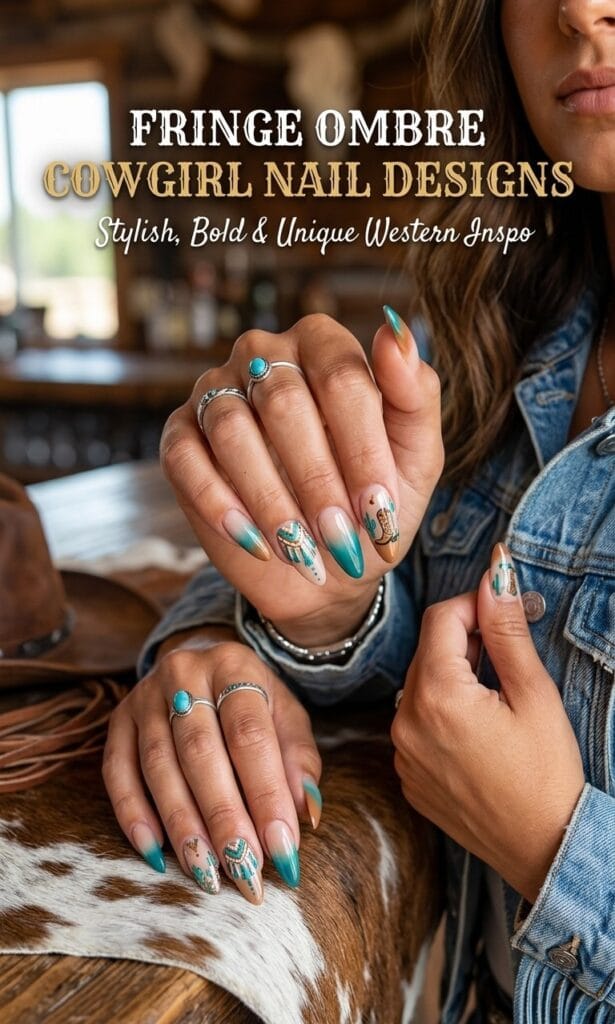
Create an ombre base using browns, tans, and creams from tip to base. Once fully set, use thin gold or rose gold striping tape or hand-painted lines to create a fringe effect over the ombre—lines should extend from approximately the middle of the nail to the tip, creating the illusion of movement and tassels. This dynamic cowgirl nail design celebrates motion and energy.
Why it works: Ombre is a foundational nail art technique that photos beautifully. Adding fringe over it creates texture and dimension. This cowgirl nail design works across different color palettes.
14. Stained Glass Western Nail Designs
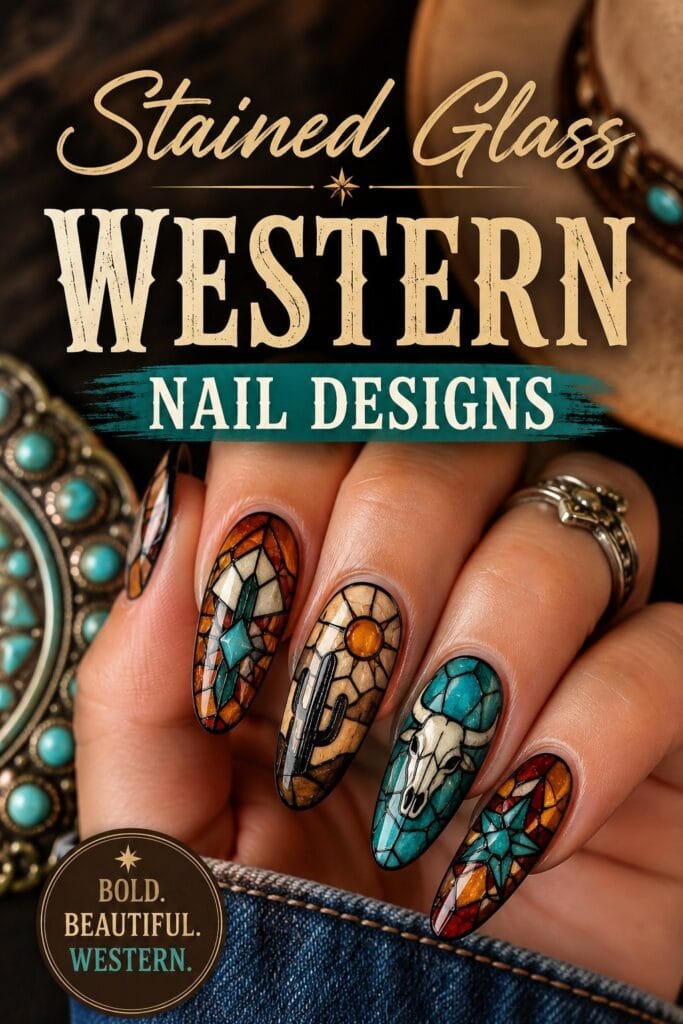
Using a white base, create thick black outlines forming geometric Western shapes—stars, diamonds, and Western motifs. Fill the sections with jewel-toned colors: deep blues, purples, teals, and warm reds. The result mimics stained glass and creates a gallery-quality cowgirl nail design with depth and artistic merit.
Why it works: The stained glass aesthetic is sophisticated. Western motifs in this style elevate cowgirl nail designs beyond typical nail art. It’s perfect for someone who appreciates art history.
15. Matte Black and Rose Gold Cowgirl Nail Designs
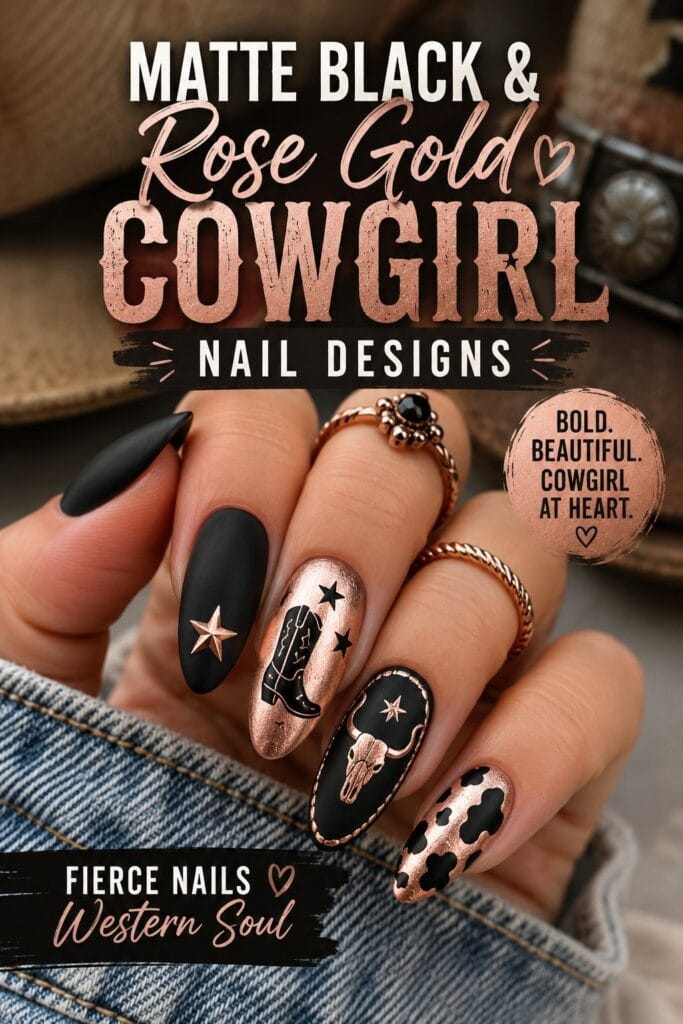
Apply a matte black base to all nails. Use rose gold metallic polish to paint delicate Western elements: lassos, stars, and small desert scenes. The warmth of rose gold against matte black creates a stunning contrast. Add a few matte black details over the rose gold for depth. This minimalist cowgirl nail design is sophisticated and modern.
Why it works: Matte black is trendy and creates drama. Rose gold is currently fashionable. This cowgirl nail design appeals to those who want Western style without overt theatricality.
16. Checkered Pattern Cowgirl Nail Designs
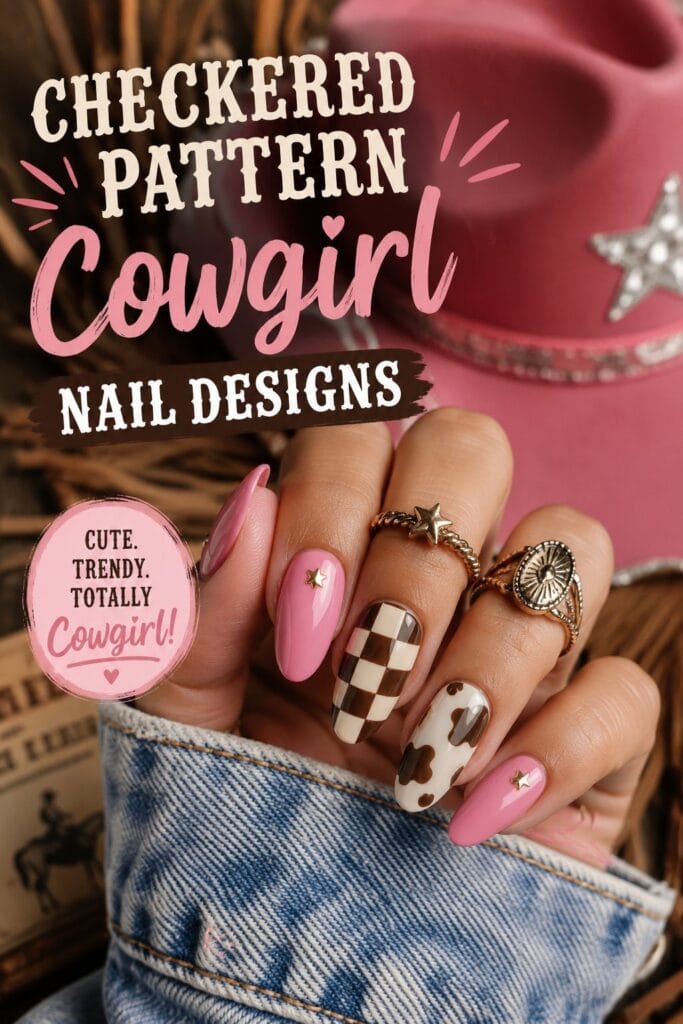
Create alternating squares of deep red and cream or tan using careful brush work or stamping plates. Add tiny Western details—boots, horseshoes, or stars—in the center of select squares. This pattern-forward cowgirl nail design is both playful and structured, creating visual rhythm.
Why it works: Checkered patterns have a Western association through cowboy flannel. This familiar pattern makes these cowgirl nail designs approachable. Pattern creates visual interest without requiring complex hand-painting skills.
17. Nude Base with Western Jewelry Details
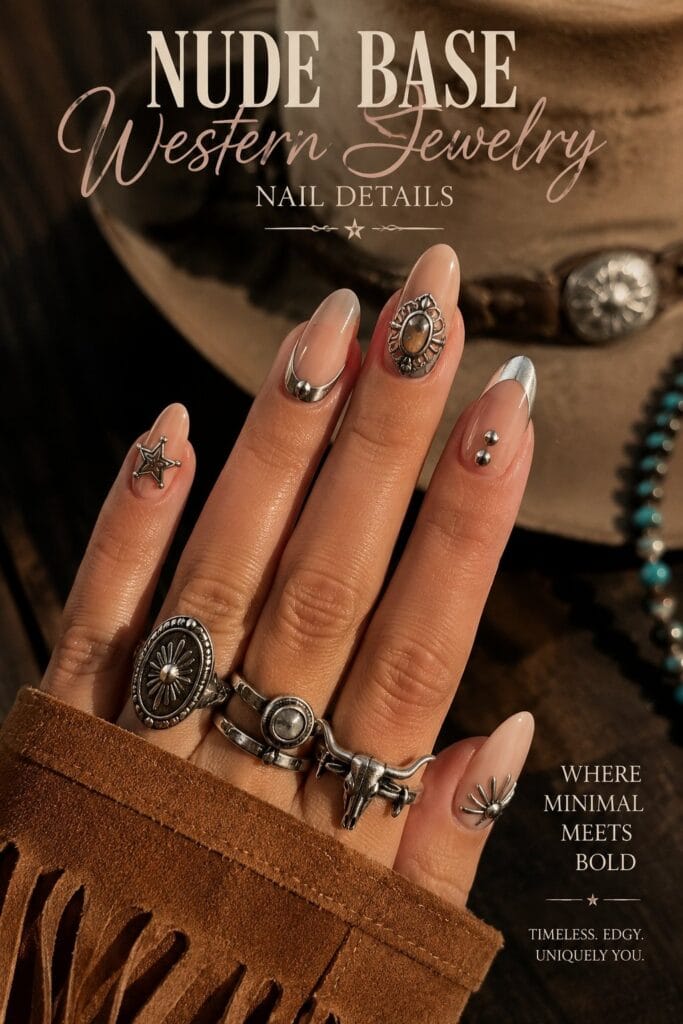
Apply a nude or natural skin-tone base to all nails. Using gold or rose gold metallic polish, paint delicate Western jewelry-inspired details: turquoise stone outlines, tiny feather designs, and geometric border patterns that suggest beaded Western jewelry. This understated cowgirl nail design is perfect for professional settings or those preferring a subtle expression.
Why it works: Nude bases elongate the appearance of nails. Adding sophisticated details maintains the Western aesthetic without overwhelming. This cowgirl nail design works for work environments where bold colors might not be appropriate.
18. Gradient Red to Gold Cowgirl Nail Designs
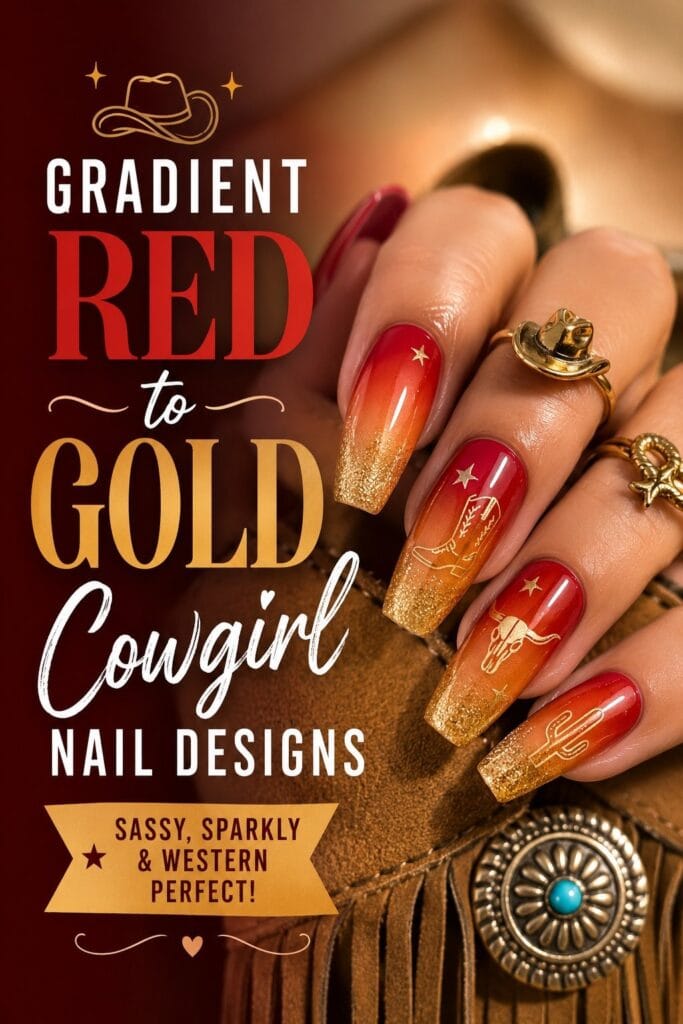
Create a gradient from deep red at the base to golden yellow at the tip, mimicking a sunset. Once set, add thin black brush strokes suggesting a lasso or rope design spiraling across the gradient. Small black silhouettes of horses or cattle in the middle of each nail add narrative depth. This cinematic cowgirl nail design tells a story.
Why it works: Gradients are technically impressive. The lasso design is quintessentially Western. This cowgirl nail design photographs beautifully with its narrative quality.
19. Turquoise with White Lace Details Cowgirl Nail Designs
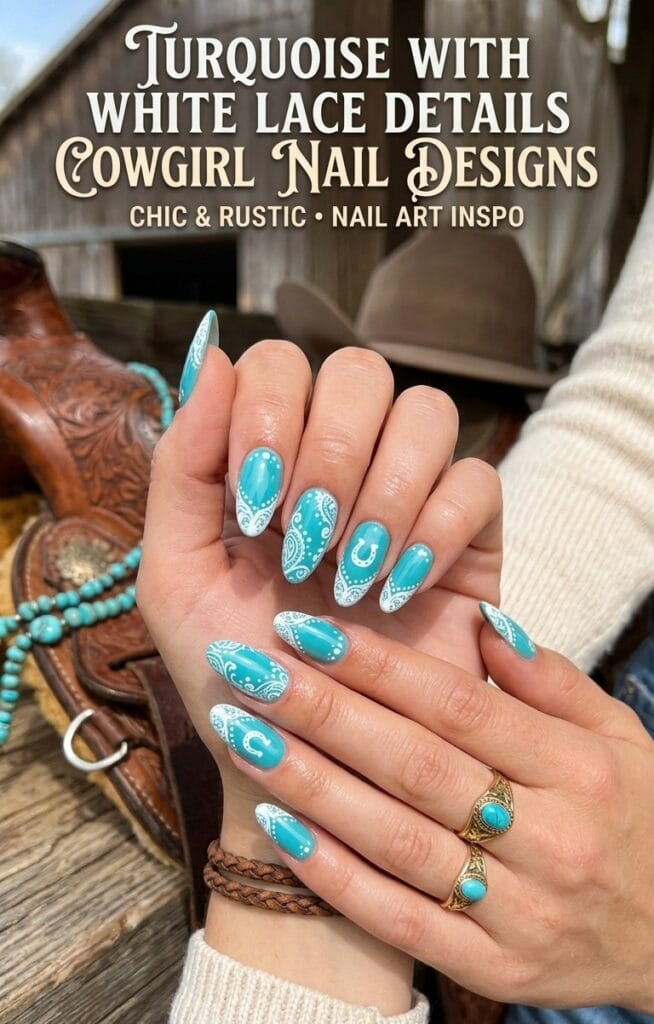
Paint all nails with turquoise polish. Using white polish and a thin brush or stamping plate, create delicate lace-like Western patterns—inspired by actual lace on Western wear—covering parts of each nail. Leave some turquoise visible to maintain color balance. Add tiny gold dots at lace intersection points. This romantic cowgirl nail design blends femininity with Western aesthetics.
Why it works: Lace is fundamentally feminine, honoring the “girl” in “cowgirl.” Turquoise and white are a fresh color combination. This cowgirl nail design celebrates Western femininity specifically, rather than generic Western aesthetics.
20. Crystal Sunset Cowgirl Nail Designs
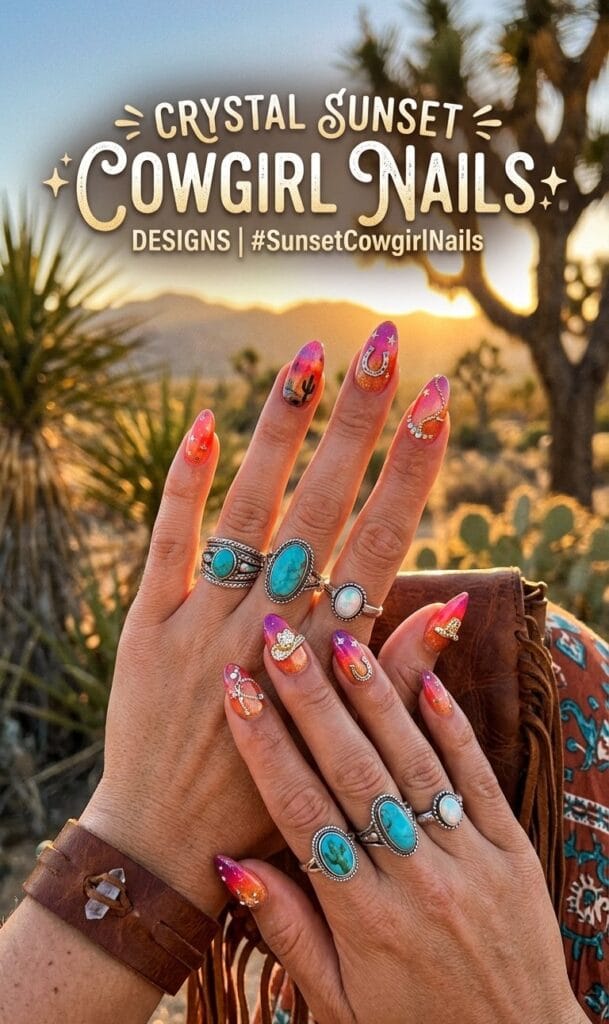
Create a sunset ombre (orange-pink-yellow gradient) on all nails. While still slightly wet, sprinkle iridescent crystal powder or use crystal dust mixed with gel to create a sparkling texture across the gradient. Add tiny black landscape silhouettes (mountains, cacti, or horses) in the middle distance. The crystals catch light, making these glamorous cowgirl nail designs absolutely stunning.
Why it works: Crystals add luxury and dimension. Sunset colors are universally appealing. This design is maximalist—it says “I’m proud of my Western style”—which aligns with cowgirl personality. Perfect for special occasions.
DIY Cowgirl Nail Designs: A Step-by-Step Guide to Creating Western Nail Art at Home
From my personal experience creating cowgirl nail designs at home, I’ve learned that success depends on preparation, patience, and practice. Let me share my proven process.
Preparation: The Foundation of Success
Before you even open your first polish bottle, proper nail preparation is absolutely critical. I learned this the hard way—rushing through prep work always led to disappointing results.
Step 1: Nail Health Assessment. Look at your nails honestly. Are they healthy and strong, or thin and brittle? If your nails are compromised, consider using a nail hardener for a week before attempting intricate cowgirl nail designs. Healthy nails hold polish better and allow the design to shine.
Step 2: Clean and File Wash your hands thoroughly with soap and water. Using a glass or metal file (gentler than traditional emery boards), file your nails into your desired shape. For cowgirl nail designs, I find that slightly longer nails—about a quarter inch past your fingertip—provide better canvas space for detailed work. However, short nails work too; just expect smaller designs.
Step 3: Cuticle Care Using a cuticle pusher, gently push back your cuticles. Don’t cut them; just move them back slightly. This creates a clean nail bed for your base coat. Dry cuticles? Use a cuticle oil or hand moisturizer.
Step 4: Buff and Prime Lightly buff the nail surface using a fine-grit buffer—this helps polish adhere better. This step is especially important for cowgirl nail designs with multiple layers and embellishments. Wipe away all dust with a damp cloth and dry completely.
Application Process
The Base Coat Layer: Apply one thin coat of base coat to all nails, working from the center toward the edges. This typically takes 30-60 seconds per nail. Wait 1-2 minutes for full drying before proceeding. This protects your natural nail and improves polish longevity.
Color Foundation: Apply your chosen base color in two thin coats rather than one thick coat. Thick polish looks lumpy and takes forever to dry. Thin coats dry evenly and create a smooth foundation for your cowgirl nail designs. Between coats, wait 2-3 minutes for drying.
Design Application Techniques
- For brush work designs: Load your thin brush with color, but not so much that it drips. Practice on a palette first. Steady your hand by resting your pinky on the table for stability.
- For stamping designs: Press the stamp firmly onto your nail for 2 seconds without twisting. Lift straight up.
- For geometric designs: Use striping tape to create clean lines. Apply tape, paint your color, and remove tape while the polish is slightly tacky.
Embellishment Placement: Whether you’re adding rhinestones, metallic foil, or other embellishments, place them on a slightly tacky layer—not completely wet, not completely dry. Use a fine-tipped stick or dotting tool to position items precisely. Press gently but firmly.
Sealing and Protection
The top coat is crucial for cowgirl nail designs durability. Apply one generous layer of your chosen top coat, ensuring complete coverage and sealing all edges. This protects your design and adds shine (or matte finish, depending on your choice). Wait 3-5 minutes for drying, depending on the formula.
Professional vs. DIY Cowgirl Nail Designs: What You Should Know
Through my journey with nail art, I’ve experienced both professional salon work and DIY creations. Here’s my honest assessment:
Professional Salon Advantages
- Technical Perfection: Professional nail technicians have years of practice. Their designs have crisp lines, even coverage, and expert embellishment placement.
- Advanced Tools: Professional salons invest in high-quality equipment, including UV lamps for gel polish (which lasts 3-4 weeks) and specialized nail art tools.
- Complex Designs: Some elaborate cowgirl nail designs—like advanced 3D effects, detailed hand-painted scenes, or customized commissions—are genuinely easier with professional expertise.
- Time Saving: A professional completes intricate designs in 1-2 hours versus potentially 3-4 hours at home.
- Durability: Professional application techniques and premium products typically mean your cowgirl nail designs last longer.
DIY Advantages
- Cost Efficiency: At-home supplies cost less than salon visits, especially if you’re doing regular cowgirl nail designs.
- Creative Control: You make every decision without relying on the translation of your vision to someone else.
- Convenience: You can create cowgirl nail designs on your own schedule.
- Practice Opportunity: Each design you create at home improves your skills.
- Personal Satisfaction: There’s genuine pride in wearing nail art you created yourself.
The Hybrid Approach
Many people find success combining both: getting professional cowgirl nail designs for special occasions while maintaining DIY designs for everyday wear. This balances cost, skill development, and occasional professional polish.
Maintaining Your Cowgirl Nail Designs: Longevity Tips from Experience
Once you’ve invested time (and possibly money) in your cowgirl nail designs, you want them to last. Here’s what actually works:
Daily Care Practices
- Avoid Excess Water: Excessive water exposure causes polish to lift and peel. Wear gloves while washing dishes, and dry your hands immediately after washing.
- Use Your Nails as Tools Minimally: Picking at things with your nails or using them as tools breaks polish and damages the nail surface. Use actual tools instead.
- Moisturize: Dry nails and cuticles lead to peeling polish. Use hand moisturizer or cuticle oil daily, especially before bed.
- Avoid Harsh Chemicals: Cleaning products, acetone, and harsh soaps damage polish. Again, gloves are your friends.
Weekly Maintenance
- Top Coat Renewal: After one week, apply a fresh top coat to worn edges. This simple step can extend your cowgirl nail designs’ life by several days.
- Detail Inspection: Check for chipping or peeling. Address minor damage immediately to prevent it from spreading.
- Gentle Buffing: If your design has lost shine, lightly buff the surface and reapply top coat.
When to Replace Your Design
Generally, traditional nail polish cowgirl nail designs last 7-10 days before chipping becomes noticeable. Gel polish versions last 3-4 weeks. When your design deteriorates beyond quick fixes, it’s time to remove it properly and create a fresh look.
Removal Best Practices
- Never Peel Polish Off: This damages your nails. Use actual nail polish remover.
- Soak and Saturate: For gel polish, use the soaking method with acetone-soaked cotton pads and foil wrapping.
- Be Patient: Give acetone time to work. Rushing leads to damage.
- Post-Removal Care: After removal, your nails may be slightly weakened. Skip designs for a few days and use strengthening treatments.
Cowgirl Nail Designs for Every Occasion
The versatility of cowgirl nail designs means you can customize them for different settings:
Everyday Casual Cowgirl Nail Designs
For daily wear, choose simpler designs like:
- Subtle turquoise accents on neutral bases
- Delicate boot prints or horseshoe details
- Minimal Western-themed patterns
- Matte finishes for a less flashy appearance
These designs maintain your Western aesthetic without overwhelming professional or formal environments.
Concert and Festival Cowgirl Nail Designs
Country music events call for bolder choices:
- Rhinestone-studded designs that catch stage lighting
- Vibrant color combinations (turquoise and coral, red and gold)
- Statement designs with dramatic elements
- Metallic and glitter finishes that photograph beautifully
- Multiple layers and embellishments
Think of your nails as part of your festival outfit—they should be visible and impressive.
Rodeo and Equestrian Event Nail Designs
For horse-centric events, incorporate:
- Horse silhouettes and ranch scenes
- Lasso and rope designs
- Saddle and Western gear details
- Earth tones (browns, tans, reds) that align with rodeo aesthetics
- Practical yet polished designs that won’t interfere with activities
Wedding and Formal Cowgirl Nail Designs
For upscale Western events:
- Elegant metallics (gold or rose gold)
- Sophisticated color palettes (burgundy and gold, turquoise and cream)
- Refined details rather than bold patterns
- Typically longer, manicured-looking nails
- White lace or delicate Western details
These designs say “I respect this occasion” while maintaining your Western identity.
Casual Date Night Cowgirl Nail Designs
For romantic settings:
- Soft color palettes (blush, nude, pale pink with gold accents)
- Delicate details like feathers or lace
- Medium-length nails with refined designs
- Feminine interpretations of Western aesthetics
- Typically, one or two accent nails
The goal is catching attention without being overwhelming.
Frequently Asked Questions About Cowgirl Nail Designs
Based on conversations with many nail art enthusiasts, here are the most common questions I encounter:
Q1: What’s the best nail shape for cowgirl nail designs?
Answer: Any shape works, but different shapes offer different benefits:
- Almond or oval: Most flattering and universally appropriate
- Square: Perfect for geometric Western patterns
- Coffin/ballerina: Trendy and provides excellent canvas space
- Round: Practical for everyday wear
I recommend choosing based on your lifestyle. If you’re very active, shorter, round nails might be more practical. If you’re designing for a special event, longer shapes provide more canvas space.
Q2: Can I create cowgirl nail designs on short nails?
Answer: Absolutely! Short nails require scaling down designs, but many cowgirl nail designs work beautifully on shorter nails:
- Simple boot or horseshoe silhouettes
- Delicate fringe details
- Geometric patterns
- Turquoise and gold accent nails
- Color blocking with Western colors
Don’t let nail length prevent you from expressing your Western style.
Q3: How do I make my cowgirl nail designs last longer?
Answer: Beyond the maintenance tips I mentioned earlier:
- Use gel polish instead of traditional polish (lasts 3-4 weeks vs. 7-10 days)
- Apply thicker top coats
- Seal all edges completely
- Minimize water exposure
- Use a top coat between weekly washes
A professional application also typically lasts longer than a DIY.
Q4: What if I mess up while creating cowgirl nail designs?
Answer: Mistakes happen to everyone—even professional nail artists. Here are your options:
- Small mistakes: Cover with your design details or add a detail that incorporates the mistake
- Major mishaps: Use rubbing alcohol on a thin brush to carefully remove the mistake before it dries
- Last resort: Remove that nail’s polish and start over on just that one nail
The best advice? Practice first on press-on nails or nail wheels before applying designs to your actual nails.
Q5: Are cowgirl nail designs appropriate for professional work environments?
Answer: This depends on your specific workplace. Here’s how to gauge:
- Conservative environments (law, finance): Choose subtle designs with neutral bases and delicate Western details in gold or rose gold
- Creative industries (art, marketing, fashion): Bolder cowgirl nail designs are typically welcomed
- When in doubt: Ask your manager or observe what colleagues wear
You can absolutely maintain your Western style while respecting professional norms through subtle design choices.
Q6: How much does it cost to get professional cowgirl nail designs?
Answer: Pricing varies by location and complexity:
- Basic designs: $35-60
- Detailed designs with embellishments: $60-100+
- Gel polish (3-4 week wear): Add $15-30 to base price
- Custom designs: $100-200+
Prices are higher in major cities and lower in rural areas. Asking salons about their cowgirl nail design pricing beforehand helps you budget.
Q7: Can men wear cowgirl nail designs?
Answer: Absolutely! Western aesthetics transcends gender. Cowboy (not just cowgirl) nail designs with the same elements—boots, horseshoes, Western colors—look fantastic on anyone. The term “cowgirl” has evolved to represent Western style broadly, but the designs themselves are for anyone who loves Western aesthetics.
Q8: What products do you specifically recommend for cowgirl nail designs?
Answer: Based on my personal experience:
Base Coats: Ridge-filling formulas create smooth surfaces for intricate designs.
Polish Brands: Invest in quality polish with good pigmentation for colors like turquoise and deep reds, essential to cowgirl nail designs.
Top Coats: High-shine formulas photograph well for Instagram and Pinterest.
Gel Products: If using gel, UV or LED curing ensures proper hardening.
Tools: Buy a complete detail brush set rather than single brushes. You’ll use multiple sizes regularly for cowgirl nail designs.
Embellishments: Purchase rhinestones in multiple sizes from art supply stores—much cheaper than nail-specific versions.
Q9: How do I take good photos of my cowgirl nail designs for social media?
Answer: Documentation is important, especially if you want your designs seen and appreciated:
Lighting: Natural daylight is best. Avoid harsh shadows by positioning nails in indirect sunlight.
Background: Use complementary backgrounds that don’t compete with your design. Solid colors or subtle textures work well.
Angles: Take photos with nails spread flat and also at angles, showing 3D elements.
Editing: Slight brightness and contrast adjustments enhance cowgirl nail designs without making them look unnatural.
Timing: Photograph your design when the top coat shine is fresh—within the first day for maximum visual impact.
Q10: Are there any health concerns with cowgirl nail designs?
Answer: When applied properly, nail designs are safe:
Traditional Polish: Non-toxic formulations are widely available. Ensure good ventilation when applying.
Gel Polish: Safe when cured properly. Follow recommended curing times with UV or LED lamps.
Rhinestones and Embellishments: Adhesives used should be nail-safe. Avoid super glue or inappropriate adhesives.
Nail Damage: Proper removal prevents damage. Never force polish off or use harsh tools on nails.
If you have sensitive skin or allergies to polish components, consult with a dermatologist or find hypoallergenic formulations.
The Psychology Behind Choosing Cowgirl Nail Designs
Through conversations with people who wear cowgirl nail designs, I’ve noticed that design choices reveal personality and identity:
Bold, Intricate Designs indicate confidence and a desire for attention. These people love making statements with their appearance.
Minimalist Western Details suggest sophistication and subtlety. These individuals want to express their Western identity without overwhelming their professional or personal image.
Colorful, Playful Designs reveal a fun-loving, creative personality that doesn’t take itself too seriously.
Elegant, Refined Designs reflect appreciation for artistry and polish (literally and figuratively).
Your choice of cowgirl nail designs communicates something about who you are. Own that!
Staying Inspired: Finding New Cowgirl Nail Designs.
The nail art community is constantly innovating. Here’s where to find inspiration:
Social Media Platforms
- Pinterest: Search “cowgirl nail designs,” “Western nail art,” and related terms. Follow nail artists who specialize in Western designs.
- Instagram: Follow hashtags like #cowgirlnails #Westernnailart #cowboynails
- TikTok: Watch nail art creation videos for technique inspiration
Nail Art Communities
- Reddit communities dedicated to nail art
- Facebook groups for nail enthusiasts
- Online forums where nail artists share work
Real-Life Inspiration
- Country music festivals and concerts
- Rodeos and Western events
- Western fashion blogs and magazines
- Nature photography of Western landscapes
Personalization Strategy: Don’t just copy designs you see. Take elements you love and combine them uniquely. The best cowgirl nail designs are personalized to your taste.
Conclusion: Your Western Style Journey Starts with Your Nails
After exploring 20 bold cowgirl nail designs and everything involved in creating and maintaining them, I hope you feel inspired and equipped to express your Western style. Whether you choose simple everyday designs or go bold with statement nails, cowgirl nail designs are a creative outlet for your personality.
The beauty of cowgirl nail designs lies in their versatility, authenticity, and celebratory nature. They honor Western heritage while remaining contemporary and fashionable. They’re bold without being inappropriate, artistic without requiring professional expertise, and personally meaningful without needing to explain yourself.
Your nails are a canvas, and with these 20 cowgirl nail designs as your starting point, you have endless possibilities for self-expression. Whether you’re heading to a concert, getting ready for a special event, or simply wanting to brighten your everyday life with your favorite aesthetic, cowgirl nail designs deliver.
So grab your nail polish, gather your tools, and start creating. Your Western journey doesn’t just live in your wardrobe or your taste in music—it shines from your fingertips. Embrace it boldly, rock it confidently, and inspire others to celebrate Western style with equal enthusiasm.
Happy designing, and may your cowgirl nail designs always catch the light!


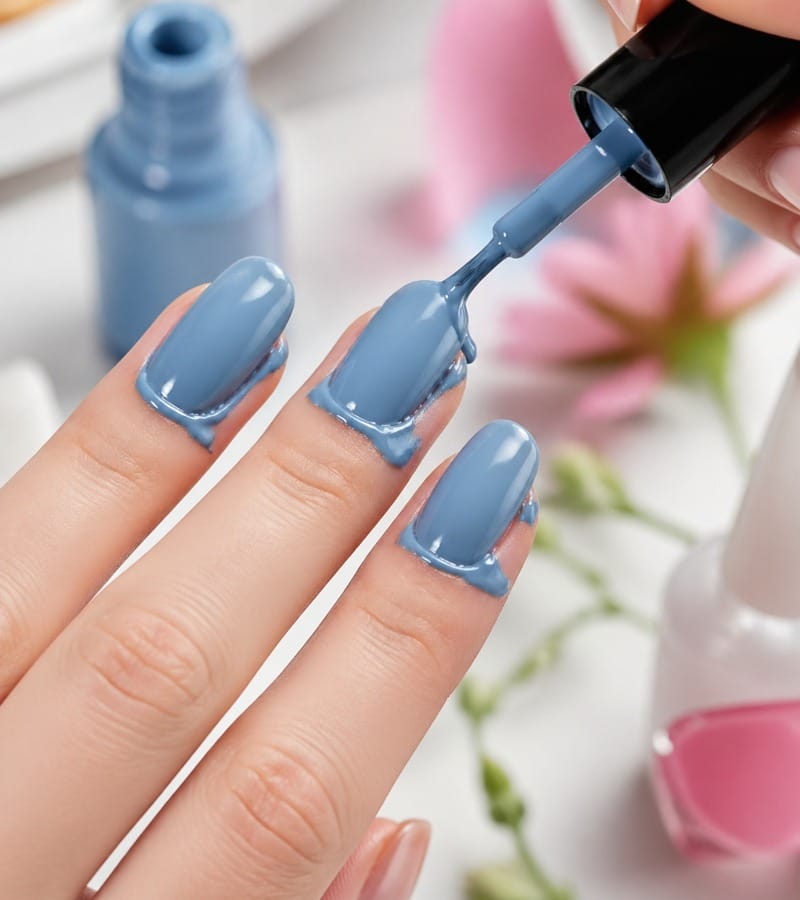
This article highlights 15 common Memorial Day nail mistakes to avoid in 2026, ensuring your nails look flawless for the holiday. From choosing the right colors to maintaining nail health, these expert tips will help you achieve the perfect festive manicure. Celebrate Memorial Day in style with nails that are both patriotic and picture-perfect!
What are Memorial Day Nails?
The Memorial Day weekend is not just a time to honor heroes; it’s also an opportunity to look your best and stand out with the perfect nails. From BBQs to parades, Memorial Day celebrations are filled with fun and excitement, and your nails should be no exception.
But before you dive into the latest nail trends, here are 15 Memorial Day Nail mistakes you need to avoid in 2026. By steering clear of these common errors, you’ll ensure that your nails are not only festive but flawless all weekend long.
15 Memorial Day Nail Mistakes 2026
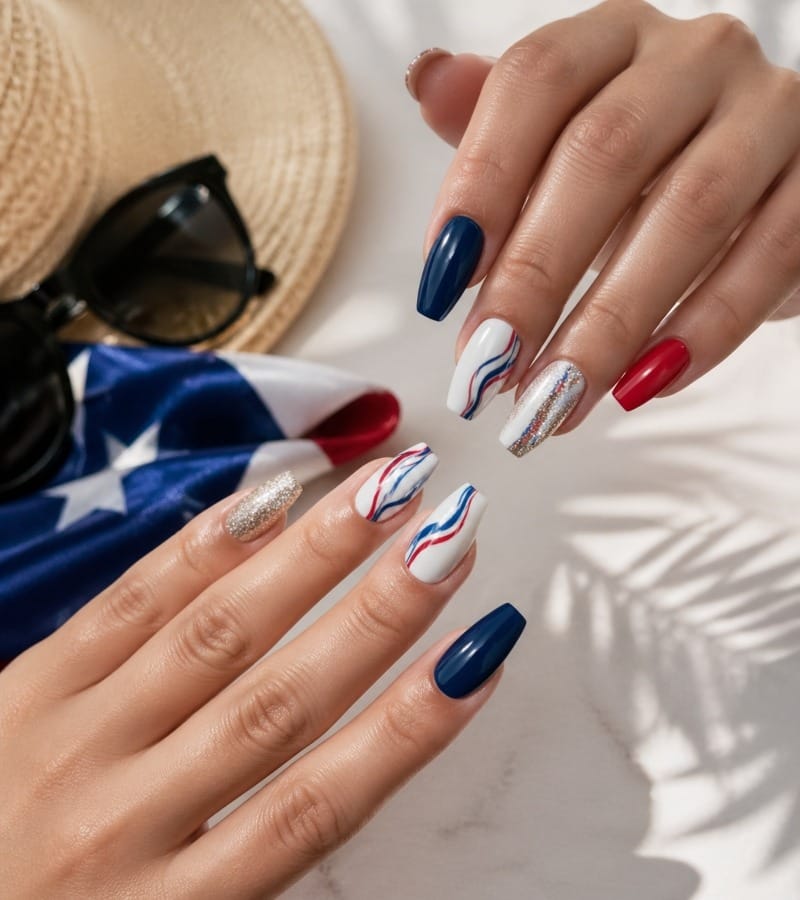
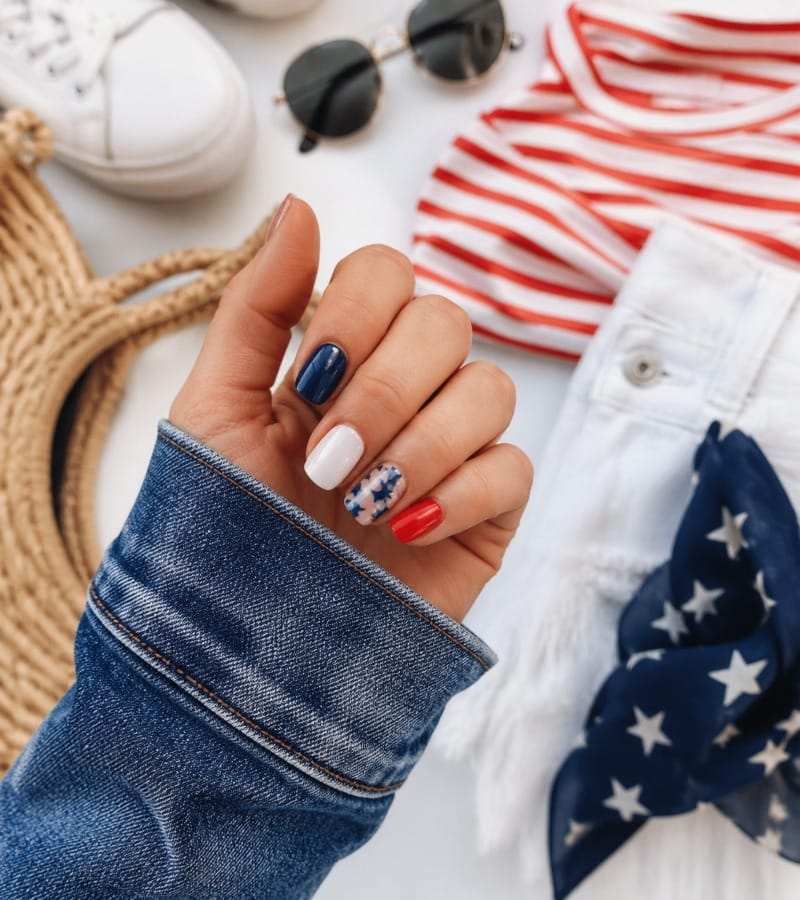
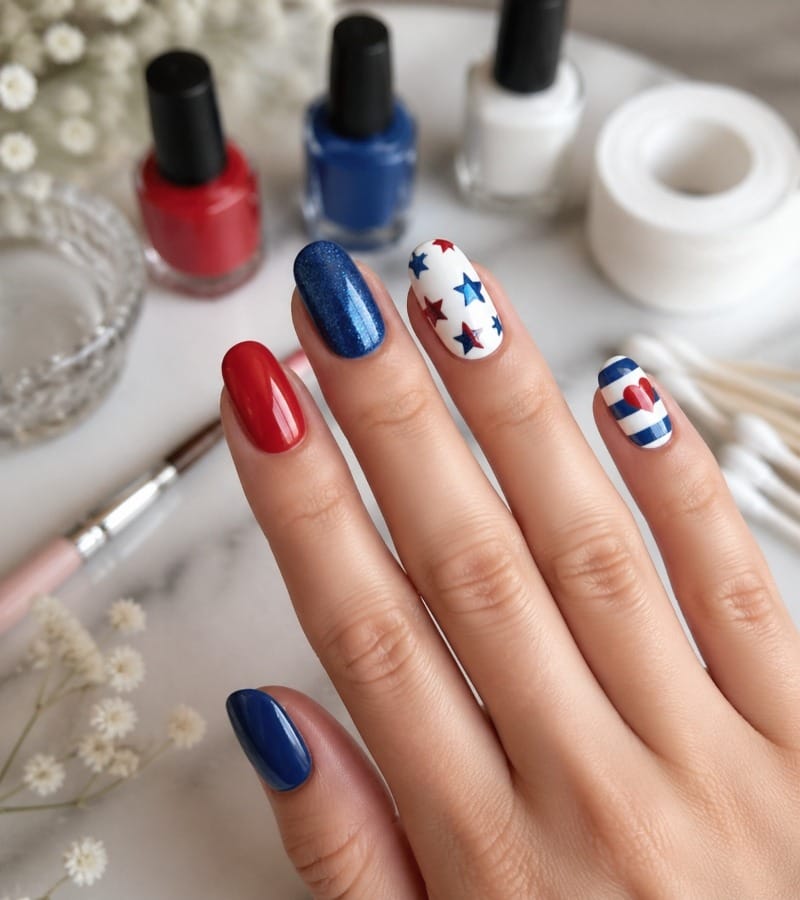
1. Choosing the Wrong Color Scheme for Memorial Day Nails

Memorial Day nails are all about celebrating patriotism and summer vibes. Many people go for bold red, white, and blue colors, but you should consider a few key things when picking the right shades.
Avoid:
- Using colors that don’t represent the holiday spirit.
- Choosing dark, dull colors that feel out of place for a Memorial Day celebration.
Tip: Stick to bright, vibrant hues like cherry reds, white pearlescent finishes, and soft pastel blues. These colors will help create an eye-catching, festive look. And don’t forget to add small touches of glitter for some sparkle!
2. Overdoing the Nail Art
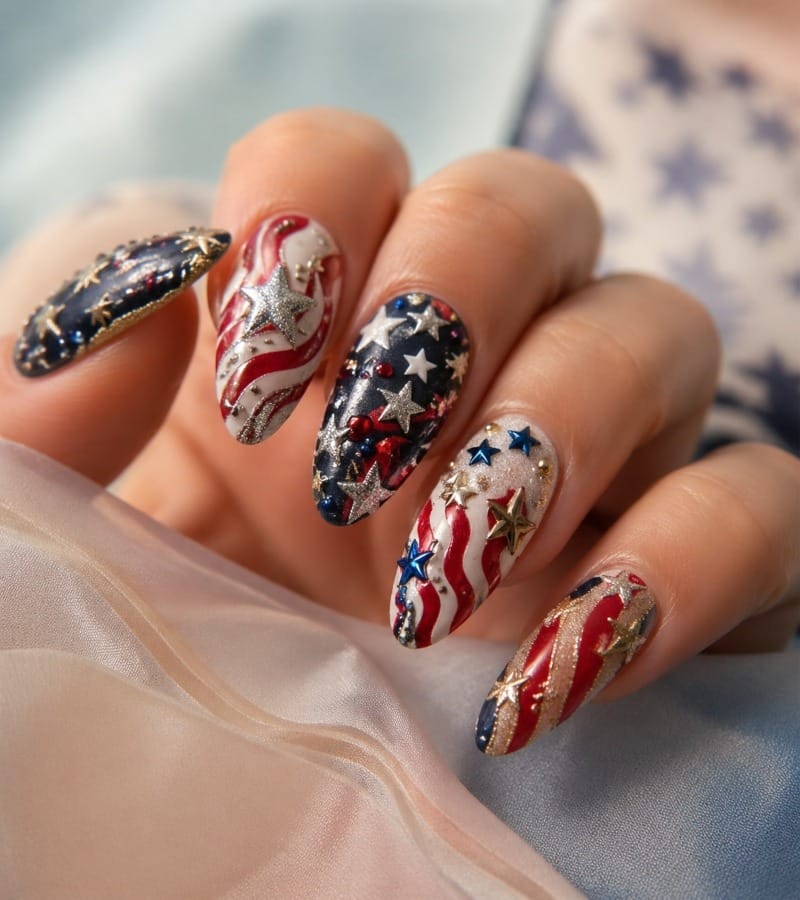
Nail art is a fun way to show off your creativity, but for Memorial Day, less is more. While intricate designs like flag patterns or fireworks might sound tempting, they can be overwhelming if overdone.
Avoid:
- Filling your nails with too many designs.
- Going for overly complex patterns that distract from the overall look.
Tip: Try a simple, chic look with a few accent nails. Maybe a subtle striped pattern or stars for a nod to the American flag. Keep the focus on clean, sharp lines for an elegant finish.
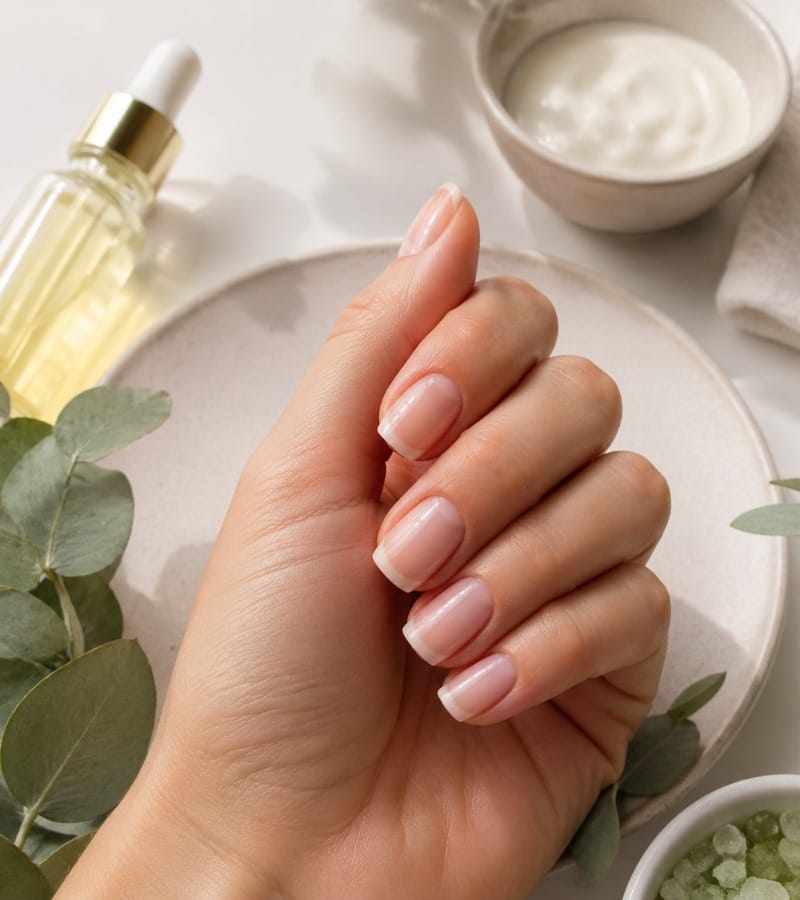
3. Forgetting Nail Care Before Applying the Polish
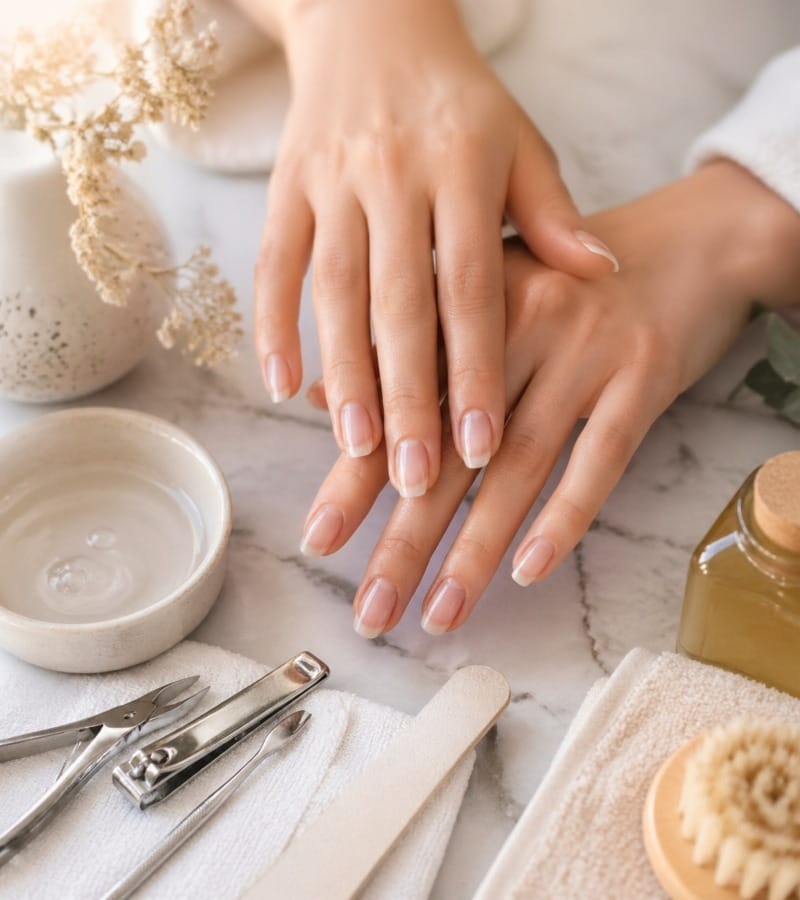
Memorial Day nails should look beautiful and healthy. Too often, people focus on color and designs without considering nail care.
Avoid:
- Skipping nail preparation, such as filing, buffing, and moisturizing.
- Not using a base coat, which can cause stains and damage to your natural nails.
Tip: Make sure to file your nails into a neat shape and hydrate your cuticles. Apply a nourishing base coat before adding your Memorial Day nail polish. This will protect your nails and make the color last longer.
4. Choosing Cheap Nail Products
In the rush to get Memorial Day nails ready, some people opt for low-quality, cheap nail products. While they might be tempting, these products can do more harm than good.
Avoid:
- Using low-quality nail polishes that chip quickly.
- Skipping top coats can lead to premature fading and cracks.
Tip: Invest in long-lasting, high-quality nail polishes and always apply a top coat for extra durability. Look for gel polishes for a chip-free finish that can last through all your Memorial Day activities.
5. Ignoring Nail Shape and Length for Memorial Day
Choosing the right nail shape and length is just as important as the color and design. Memorial Day nails should be practical yet stylish.
Avoid:
- Choosing a nail shape that doesn’t suit your finger shape.
- Going for excessively long nails that are impractical for daily activities.
Tip: Opt for a shape like oval or almond for a balance of style and ease. Keep the length moderate to avoid breaking nails during your Memorial Day festivities.
6. Overlooking Nail Health
In the pursuit of festive designs and colors, don’t forget that healthy nails are the foundation of a great look.
Avoid:
- Using harsh chemicals that can damage nails.
- Skipping regular nail maintenance.
Tip: Keep your nails healthy by moisturizing them regularly, avoiding nail biting, and using gentle nail products. Treat your nails with love to ensure they stay strong and beautiful for Memorial Day and beyond.
7. Not Applying the Right Base Coat
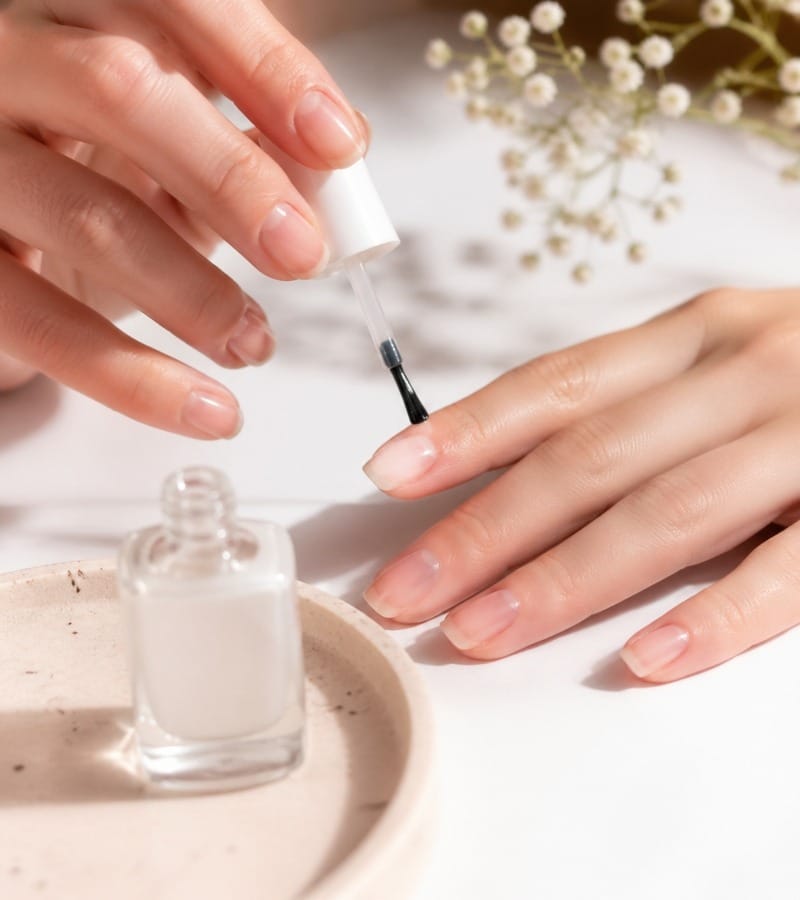
The base coat plays a crucial role in your Memorial Day nails. It’s more than just a layer under the polish.
Avoid:
- Skipping the base coat or using one that doesn’t suit your nail type.
- Not applying it evenly, leading to uneven nail color.
Tip: Use a base coat that promotes adhesion and protects your nails. For extra benefits, use one that strengthens your nails and prevents staining from darker shades.
8. Applying Too Many Coats of Polish
Memorial Day nails should be bold, but applying too many coats of nail polish can ruin the overall look and make your nails look thick and uneven.
Avoid:
- Layering too many coats of polish leads to clumpy nails.
- Not letting each layer dry before applying another.
Tip: Stick to two thin coats of polish for a smooth, streak-free finish. If you want more intensity, go for a gel polish that gives a rich color without the need for multiple layers.
9. Skipping the Drying Process
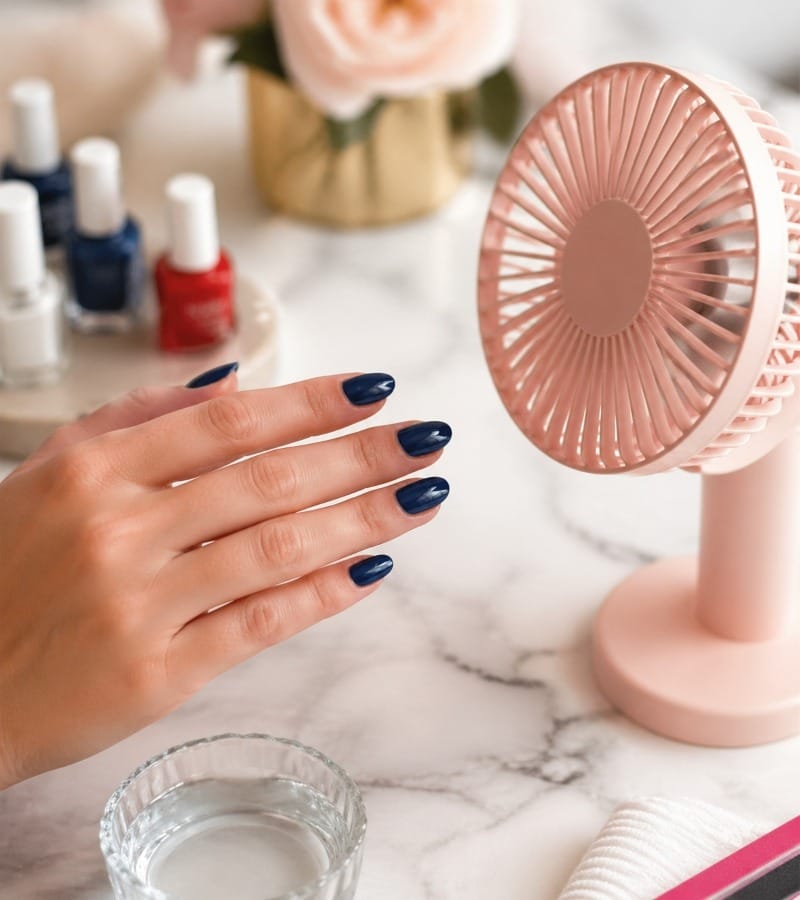
After all the hard work on your Memorial Day nails, don’t rush the drying process.
Avoid:
- Not allowing your nails to fully dry before using your hands.
- Trying to speed up the process with shortcuts that don’t work.
Tip: Give your nails the time they need to dry completely before you engage in any activities. If you’re in a hurry, use a quick-dry top coat to speed up the process.
10. Not Considering Your Outfit
Your Memorial Day nails should complement your outfit. While bold colors are a staple for the occasion, they need to match the overall vibe of your look.
Avoid:
- Choosing nail colors or designs that clash with your clothes.
- Not considering the balance between your nails and the rest of your outfit.
Tip: Plan your nails around the outfit you’ll be wearing. If you’re sporting a simple, monochrome outfit, feel free to go bold with your nails. If you’re wearing a floral dress, try more muted, pastel tones.
11. Forgetting to Clean Up the Edges
The clean-up process after painting your nails is just as important as the application.
Avoid:
- Leaving polish on your skin around the nails.
- Not tidying up stray polish on the sides.
Tip: Use a small brush dipped in nail polish remover to carefully clean around your nails for a crisp, professional finish.
12. Skipping Aftercare

After a long weekend, your Memorial Day nails need some TLC.
Avoid:
- Not giving your nails the attention they deserve after a busy holiday.
- Ignoring moisturizing and cuticle care.
Tip: Post-holiday, hydrate your nails and cuticles with oils or lotions. This will keep them looking fresh and healthy after all the festivities.
13. Not Preparing for Nail Chipping
Your nails will face a lot of activity during Memorial Day – cooking, eating, playing, and more. Without proper preparation, chips are inevitable.
Avoid:
- Ignoring nail chipping prevention.
- Not having a nail repair kit on hand.
Tip: Use a chip-resistant top coat and carry a small nail repair kit with you for emergencies.
14. Ignoring Seasonal Trends
While Memorial Day nails are classic, it’s also important to keep up with current trends.
Avoid:
- Sticking to outdated designs that don’t fit the latest trends.
- Not experimenting with trendy elements like holographic or metallic nails.
Tip: Incorporate trending elements like holographic tips or metallics into your Memorial Day nail design for a modern twist.
15. Rushing Through the Process
Lastly, don’t rush through the nail process. Memorial Day is a time to enjoy, relax, and celebrate, and your nails should be no exception.
Avoid:
- Rushing through nail prep or design.
- Skipping steps to save time.
Tip: Take your time, enjoy the process, and appreciate the results. Great nails come from care and attention to detail.
FAQs
What Color Nails for Memorial Day?
When choosing nails for Memorial Day, it’s important to go for colors that reflect the patriotic spirit of the holiday. Red, white, and blue are always top choices, but you can also opt for a soft pastel blue or creamy white for a more subtle look.
Tip: Consider adding a hint of shimmer or metallic accents to make your nails pop. These hues will give a refined yet festive touch to your Memorial Day look.
What Color Symbolizes Memorial Day?
The colors most strongly associated with Memorial Day are red, white, and blue. These colors represent the American flag and are a tribute to the heroes who served the nation. Wearing these colors helps to honor their sacrifice and spirit.
Tip: While these are the traditional Memorial Day colors, feel free to experiment with ombre effects or add small decorative details like stars to make your design stand out.
What Is the Rich Girl Nail Trend?
The Rich Girl Nail trend is all about elegance, luxury, and simplicity. It focuses on high-shine finishes, long nails, and minimalist designs, with a preference for sophisticated shades like deep navy or metallics.
Tip: For Memorial Day, you can incorporate this trend with subtle red, white, and blue designs. A sleek, glossy blue or elegant white with gold accents can give you that luxurious, patriotic look.
What Is a Good Color for Memorial Day?
While red, white, and blue are always the go-to colors for Memorial Day, you can also try colors like metallic gold, silver, or even a pastel blue. These colors bring a fresh, modern twist to the traditional Memorial Day palette.
Tip: Pair a soft blue with silver accents for a more sophisticated style, or go bold with a vibrant cherry red for a striking look.
Can I Use Glitter on Memorial Day Nails?
Yes! Glitter is a great way to add some sparkle to your Memorial Day nails and make them extra festive. Whether you choose a glittery red or blue or just add a subtle sparkle to one accent nail, glitter will elevate your look.
Tip: Use glitter sparingly to avoid overwhelming your design. You can also combine a glitter accent with classic stripes or stars for a patriotic touch.
How Long Should I Let My Memorial Day Nails Dry?
To avoid smudging and to ensure your Memorial Day nails last longer, it’s essential to give them enough time to dry. Typically, nail polish needs at least 30 minutes to an hour to dry fully, but if you’re in a rush, use a quick-dry top coat.
Tip: Use a drying spray or a fan to speed up the process. However, make sure your nails are completely dry before doing any activities to prevent chips or smudges.
How Do I Make My Memorial Day Nails Last Longer?
To make your Memorial Day nails last longer, it’s essential to take care of your nails both before and after application. Ensure you start with clean, moisturized nails and finish with a long-lasting top coat.
Tip: Avoid using your nails as tools (for opening cans or packages) to reduce the chance of chips. Reapply a top coat every few days to maintain the shine.
Conclusion
Memorial Day is a time to celebrate and honor the sacrifices of those who have served, and your nails should reflect that spirit with a festive, polished look. By avoiding these common Memorial Day nail mistakes, you can ensure that your nails not only look great but also last throughout all the fun and festivities.
Whether you’re choosing the perfect colors, experimenting with designs, or taking care of your nails with the right products, the key to flawless Memorial Day nails is in the preparation and attention to detail. From picking the right shades to ensuring nail health, every step contributes to making your nails the perfect accessory for this important holiday.
Remember, Memorial Day nails are about celebrating patriotism with style, and a little extra care goes a long way. By following these tips, you’ll be ready to flaunt your stunning nails at every BBQ, parade, or party in 2026. So take your time, enjoy the process, and let your nails shine as brightly as the holiday itself!
Now that you’re equipped with these essential tips, it’s time to get creative and make your Memorial Day nails stand out in the best way possible!
Introduction
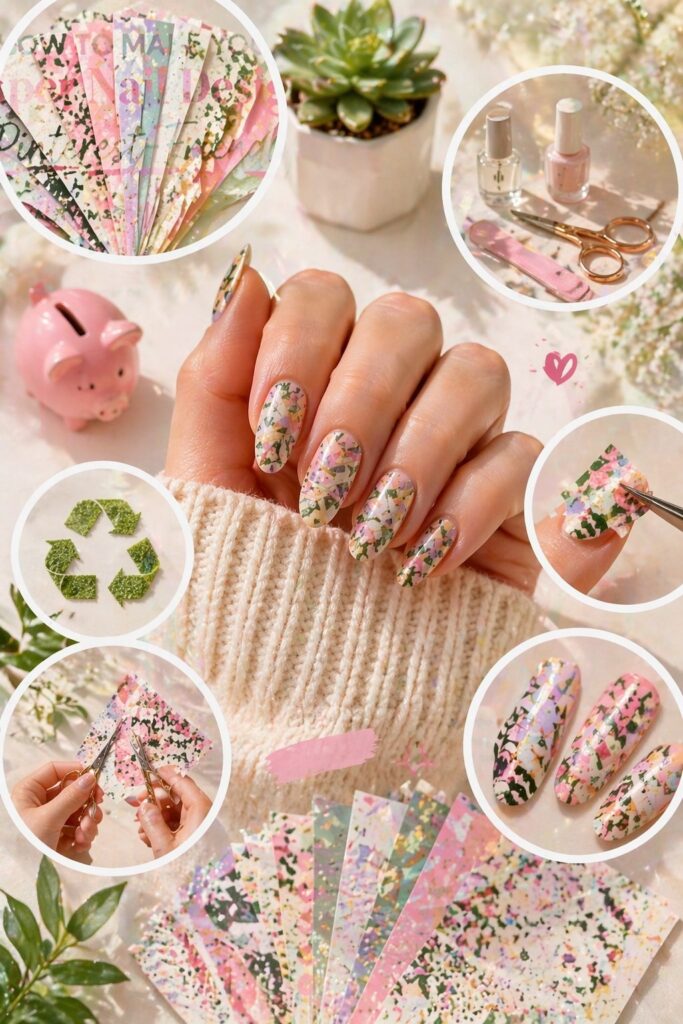
In 2026, paper nail designs are not just a passing trend; they’re a way for people to express their creativity while saving money and time. DIY nail art is growing in popularity, and with paper designs, anyone can achieve professional-looking nails from the comfort of their home.
Paper nails offer flexibility, affordability, and endless possibilities. Whether you’re a beginner or a seasoned pro, paper nail designs provide an excellent opportunity to experiment with your nail art skills.
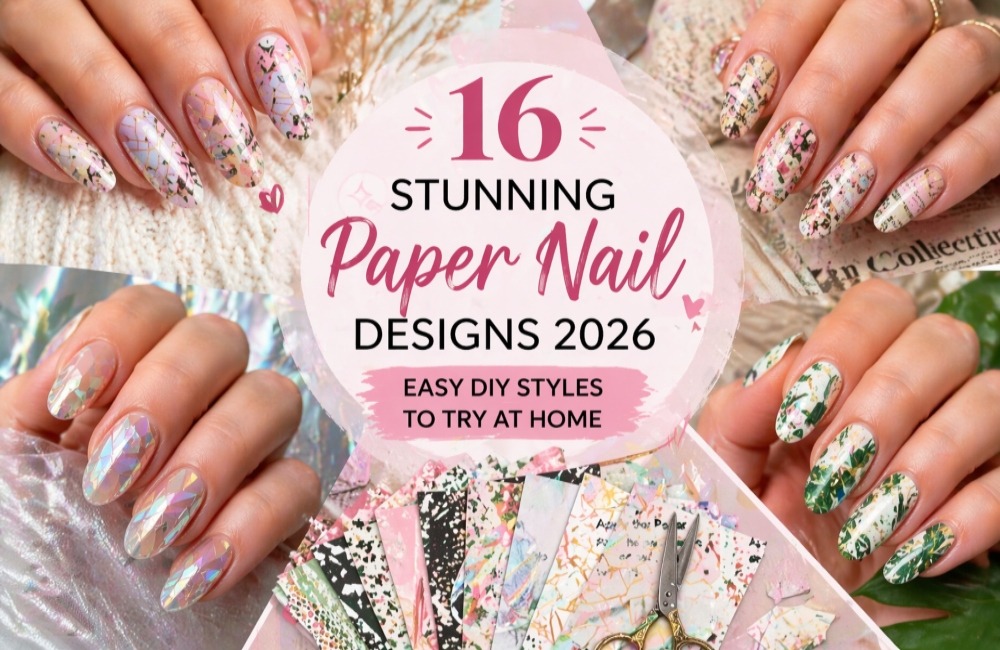
From geometric patterns to floral prints, in this article, you’ll learn how to create 16 stunning paper nail designs that will make your paper nail designs stand out. Let’s dive into these creative nail ideas and discover the best way to incorporate paper into your manicure.
Why Paper Nail Designs Are Perfect for DIY Enthusiasts in 2026
Paper nail designs have gained momentum in the beauty industry for many reasons. These designs are not only affordable but also customizable, offering a personal touch that’s hard to beat. Let’s explore why paper nail designs are such a popular trend in 2026.
- Affordability and Accessibility
Creating beautiful paper nail designs at home has never been more accessible. Unlike salon manicures that can cost a small fortune, paper nail designs can be made using supplies you already have at home. All you need are simple materials like paper, scissors, glue, and a top coat, making this an affordable DIY solution for those on a budget.
- Endless Creativity
One of the biggest draws of paper nail designs is the endless design possibilities. From abstract patterns to intricate florals, paper designs give you the freedom to get creative and experiment with different textures, colors, and styles.
- Suitable for All Skill Levels
Whether you’re new to nail art or you’ve been practicing for years, paper nail designs are easy to create. With minimal tools required, anyone can enjoy the process and achieve professional-looking nails at home.
- Eco-Friendly
Paper is a sustainable material, making it a great choice for those looking to reduce their environmental impact. Unlike plastic-based nail wraps or stickers, paper nails are biodegradable, helping to minimize waste in the beauty industry.
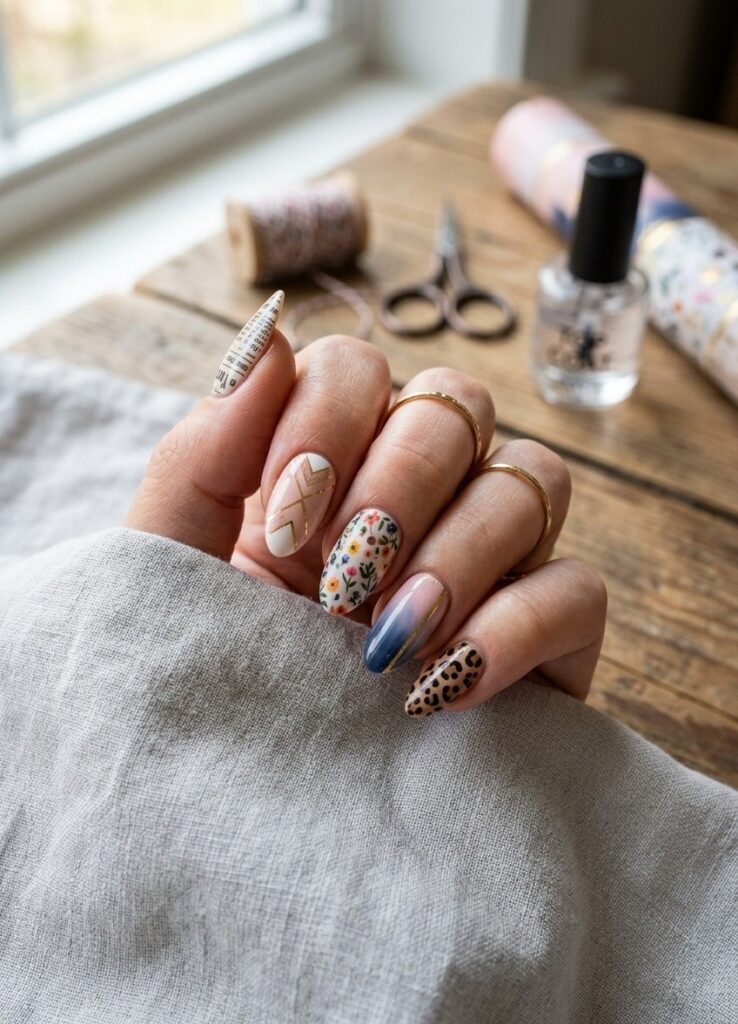
16 Stunning Paper Nail Designs to Try at Home
Now that you’re equipped with the basics, let’s explore 16 stunning paper nail designs that are perfect for creating unique, eye-catching nail art at home. Whether you prefer a minimalist look or something bold and colorful, you’ll find a design that suits your taste.
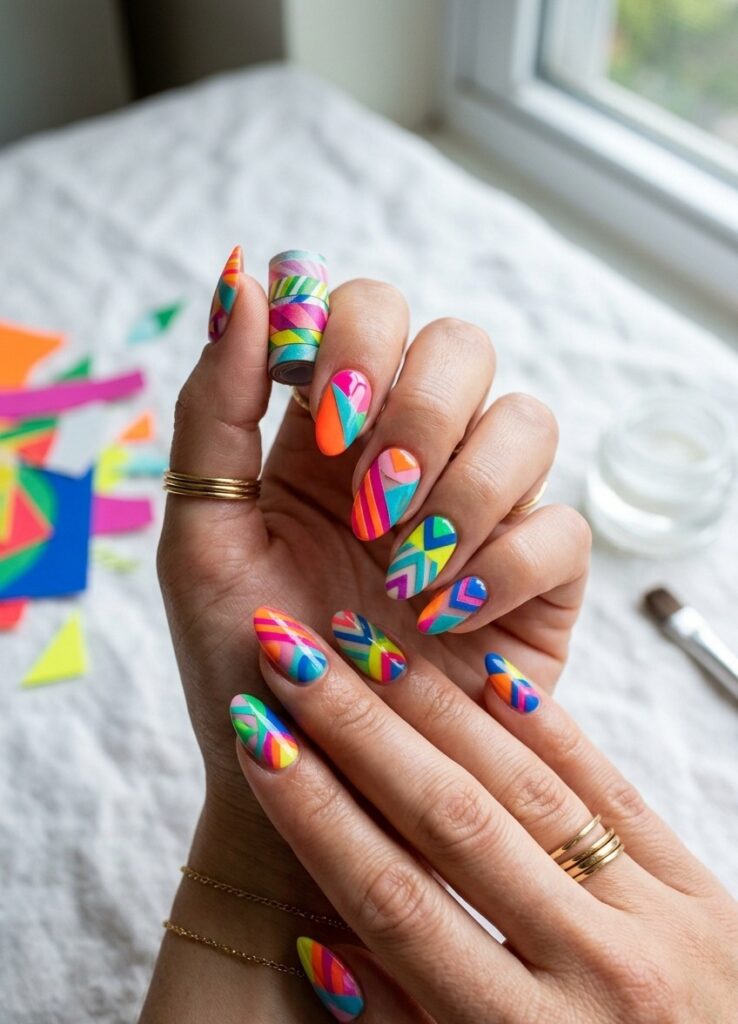
1. Geometric Paper Nail Art
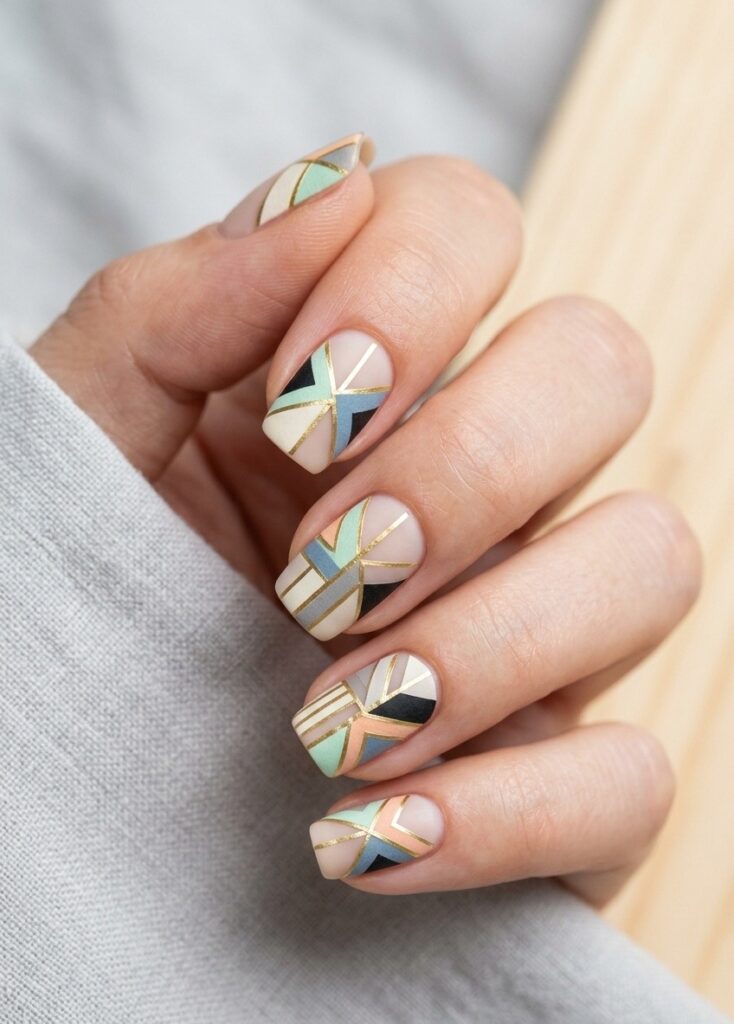
Geometric patterns are perfect for creating clean, modern nail art. Use strips of thin paper to create triangles, squares, or abstract shapes on your nails. Pair these patterns with bold, contrasting colors for a striking design.
2. Floral Paper Nails
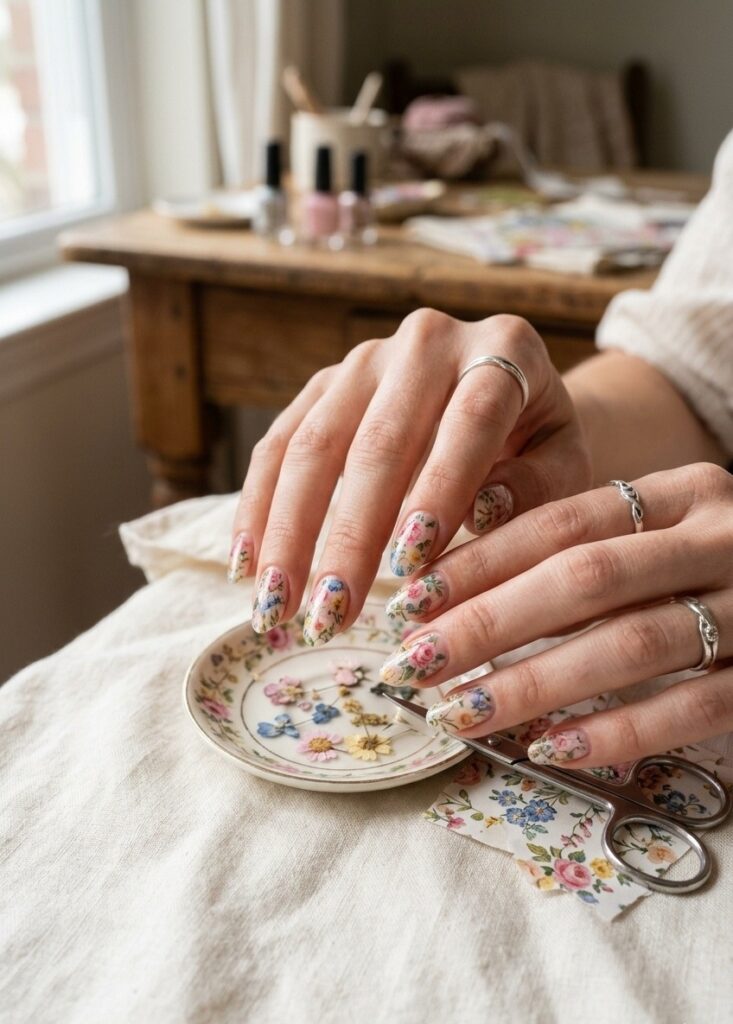
For a soft, feminine look, floral paper designs are always a great choice. Choose paper with delicate flower patterns and carefully cut them out to fit your nails. This design is perfect for spring and summer.
3. Marble Effect with Paper
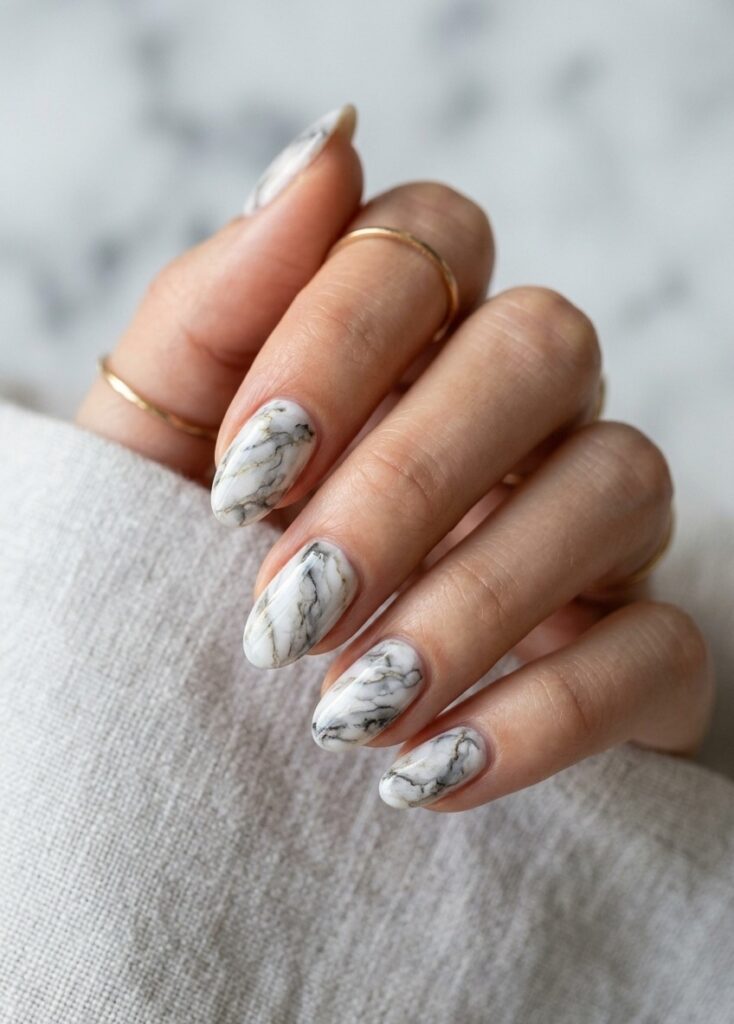
Achieve a sophisticated marble look by tearing paper into irregular shapes and placing them on your nails. The randomness of the design mimics the natural veining of marble, giving your nails a chic, high-end appearance.
4. Abstract Paper Collage Nails
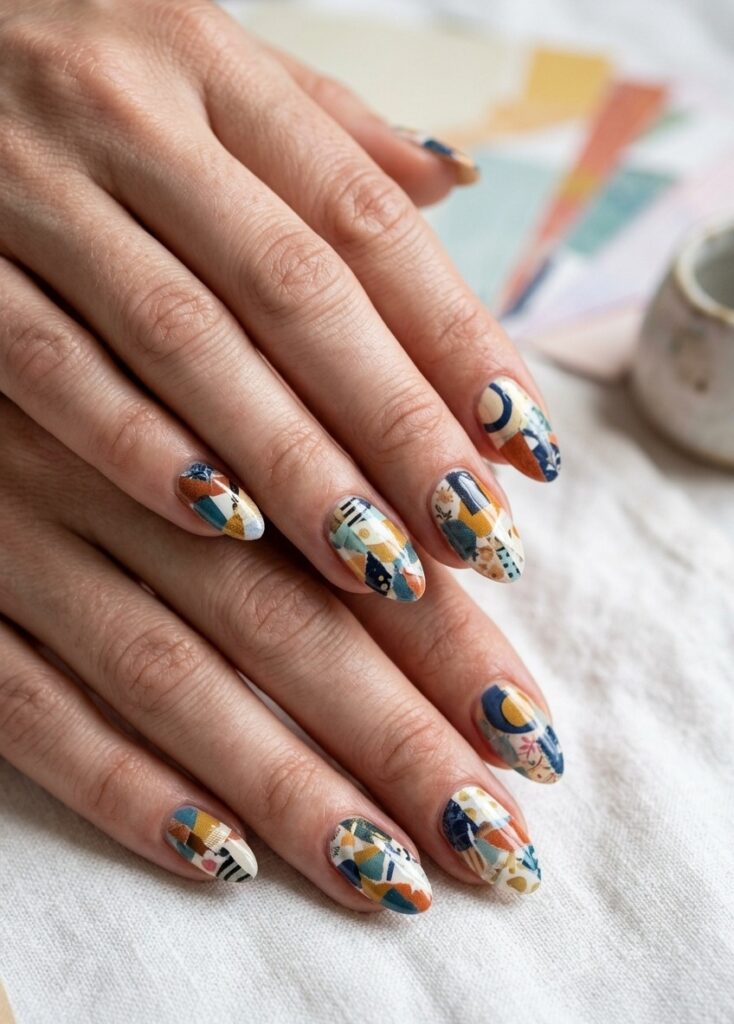
If you love abstract art, try creating a collage on your nails using colorful pieces of paper. This design is perfect for anyone who enjoys experimenting with mixed patterns and textures.
5. Vintage Newspaper Nail Designs
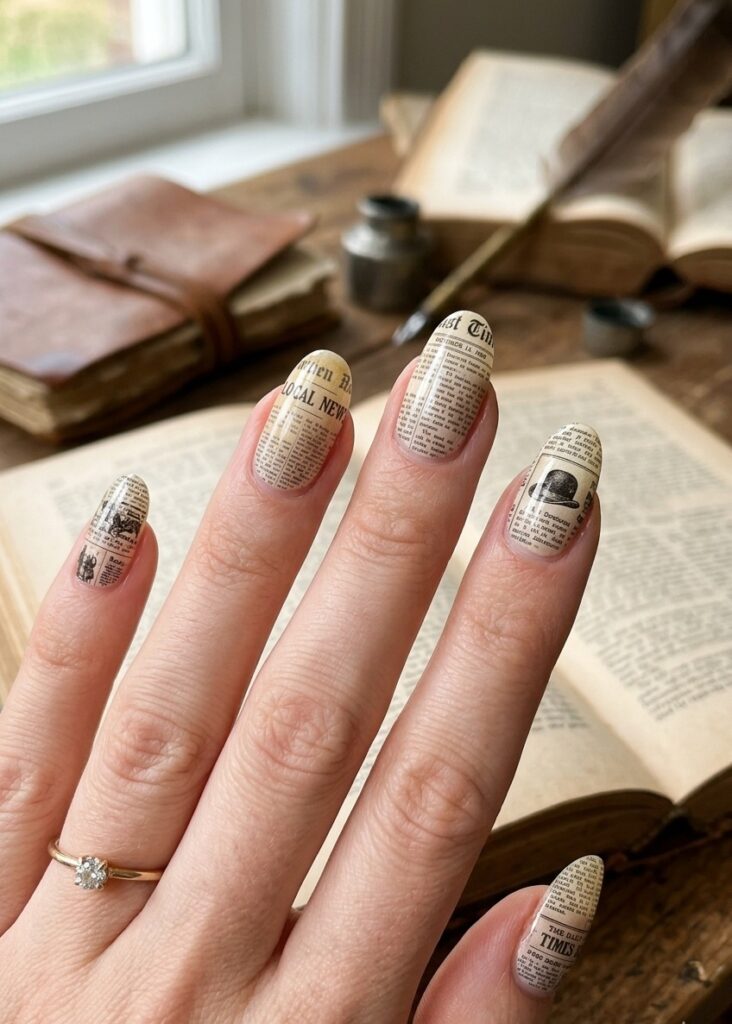
For a retro-inspired look, use newspaper clippings as the main element of your nail art. Cut small pieces of paper with text or vintage designs and place them on your nails for an old-school vibe.
6. Gradient Paper Nails
A gradient effect can be easily achieved with paper by arranging the pieces from dark to light. This subtle fade adds a sophisticated touch to your paper nail designs, making them look elegant and stylish.
7. Polka Dot Paper Nails

Polka dots are fun and playful. Use paper with a polka dot pattern and cut out small circles to create this charming design. It’s perfect for a youthful, fun vibe.
8. Animal Print Paper Nails
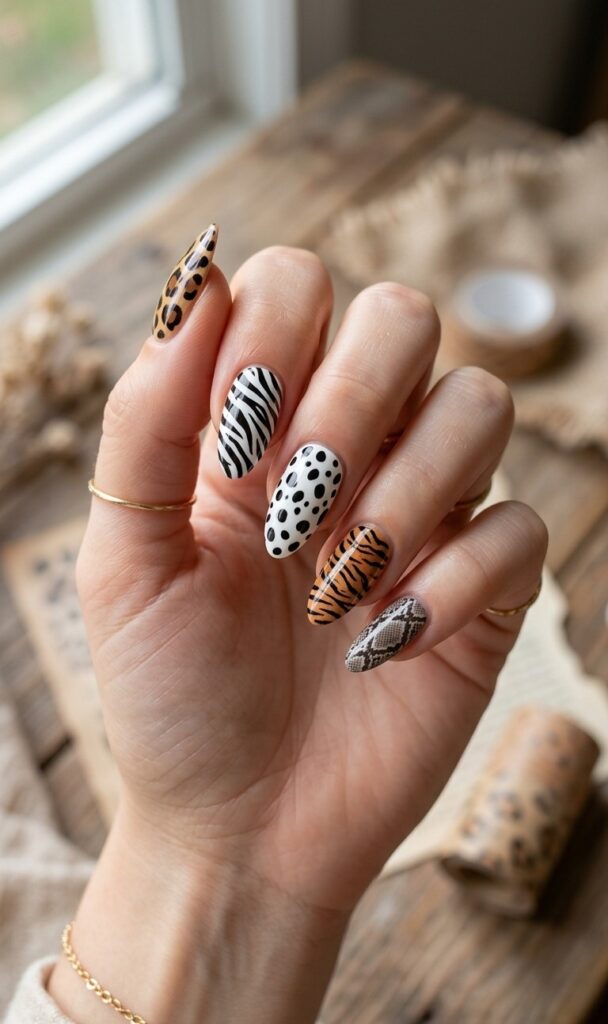
Add a bold, edgy flair to your nails by using paper with animal prints like leopard, zebra, or snake skin. These paper nail designs are perfect for those who want to show off their wild side.
9. Holographic Paper Nail Art
For a futuristic touch, use holographic paper that changes color depending on the light. This eye-catching design gives your paper nail designs a multidimensional, glamorous look.
10. Nature-Inspired Paper Nails
Bring the outdoors to your fingertips by using paper with leaf or tree patterns. These nature-inspired designs give your paper nail designs a calm, organic feel and are perfect for an earthy, boho look.
11. Metallic Foil Paper Nails
For a luxurious and chic nail design, use metallic foil paper in gold, silver, or copper. Apply the foil in sections to create elegant, high-end nail art.
12. Minimalist Paper Nails
Keep it simple with minimalist paper designs. Use thin, delicate lines or small geometric shapes to create a sleek and modern look. This design is perfect for those who appreciate subtle elegance.
13. Bright and Bold Paper Nail Art
If you love vibrant colors, use neon or bright-colored paper to create bold designs. The contrast of bright hues will make your paper nail designs pop and attract attention.
14. Watercolor Paper Nails
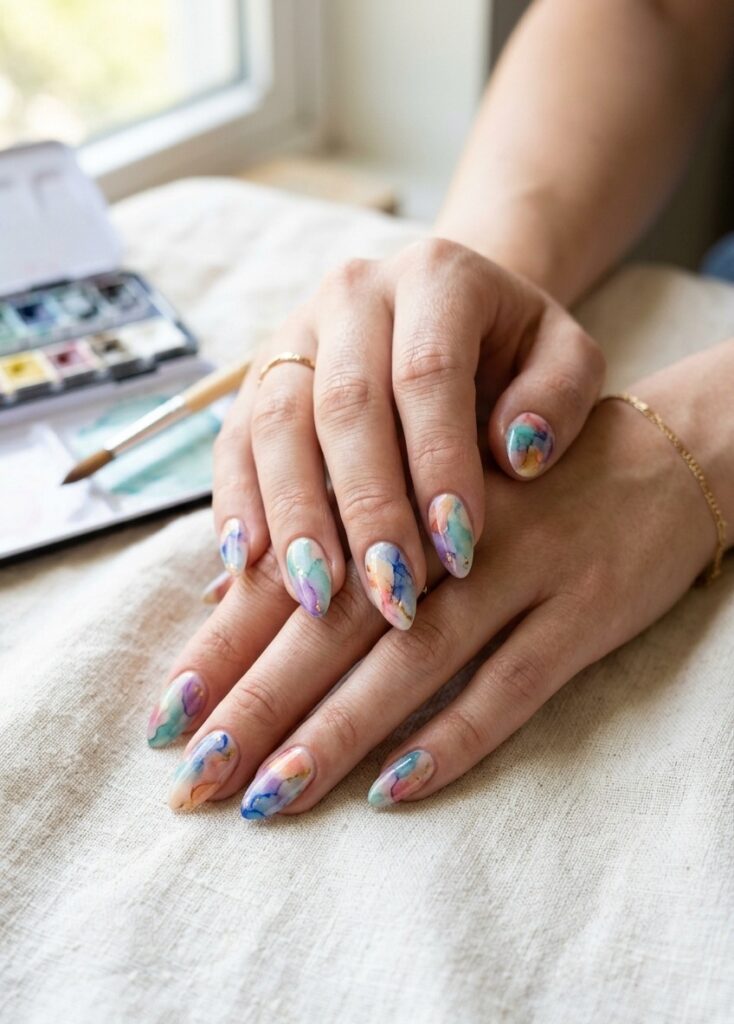
For an artistic look, use paper with watercolor-inspired designs. This soft, blended pattern creates an ethereal look that’s both beautiful and unique.
15. Seasonal Paper Nail Designs
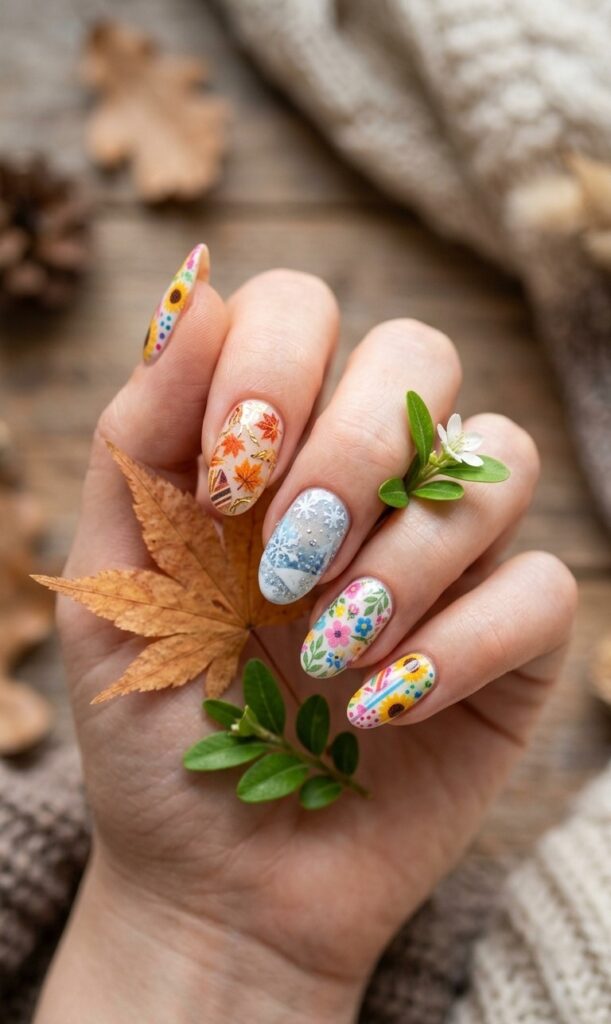
Celebrate the changing seasons with seasonal designs. Use paper featuring snowflakes, pumpkins, or floral patterns to reflect the time of year. These paper nail designs are perfect for holiday celebrations.
16. Sweet Treat Paper Nails
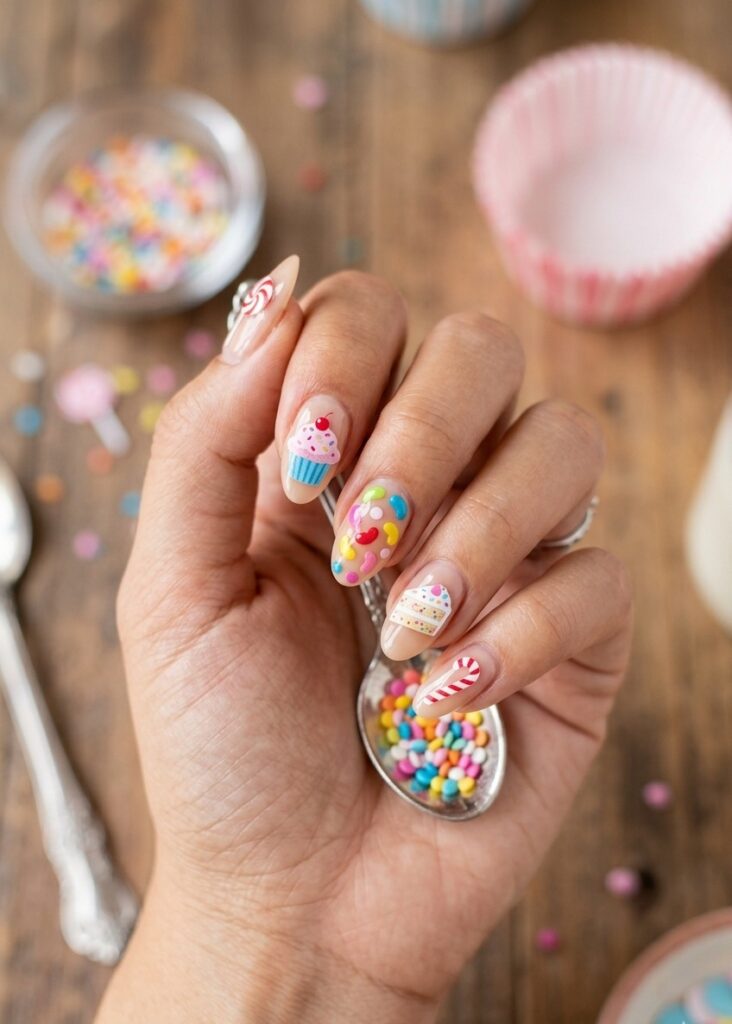
For a playful and fun design, use paper featuring sweet treats like cupcakes, candy, or donuts. This whimsical design is sure to put a smile on your face.
Essential Tips for Creating Stunning Paper Nail Designs
Before jumping into specific paper nail design ideas, let’s cover some essential tips to make sure your paper nail art is flawless. By following these simple tips, you’ll ensure that your designs last longer and look their best.
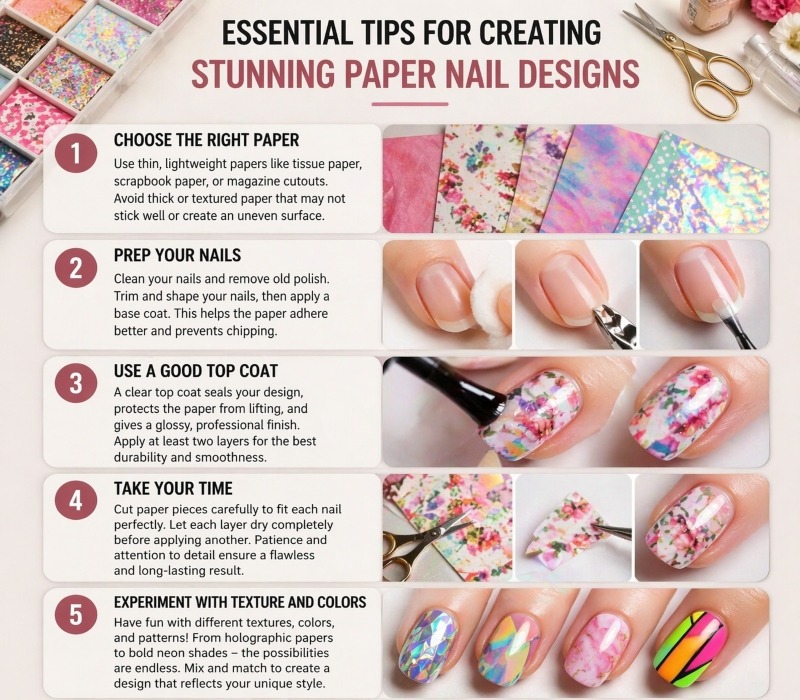
- Choose the Right Paper
The key to successful paper nail designs is selecting the right paper. Tissue paper, scrapbook paper, or even magazine cutouts work best. Avoid thick or textured paper that may not stick well to your nails or create an uneven surface. Thin, lightweight papers are easy to work with and mold to the nail’s shape.
- Prep Your Nails
Start by cleaning your paper nail designs and removing any old polish. Trim and shape your nails to your desired length, then apply a base coat. This ensures the paper will adhere properly and prevent the design from chipping too soon.
- Use a Good Top Coat
A clear top coat is essential for sealing your paper nail design. It protects the paper from lifting and gives your nails a glossy, professional finish. Apply at least two layers of top coat to ensure durability and smoothness.
- Take Your Time
Paper nail art requires patience. Cut your paper pieces carefully to fit each nail, and let each layer dry completely before applying another. This attention to detail will ensure that your design is flawless and long-lasting.
- Experiment with Texture and Colors
Don’t be afraid to experiment with different textures, colors, and patterns. From holographic papers to bright neon colors, the possibilities are endless. You can mix and match to create a design that reflects your unique style.
How to Make Your Paper Nail Designs Pinterest-Friendly
Pinterest is a visual platform, and to succeed on it, your paper nail designs need to stand out. Here’s how to optimize your content for Pinterest:
- High-Quality Images
Pinterest users are drawn to high-quality images. Make sure your photos are bright, well-lit, and showcase your nails clearly. Consider using a clean background to make your designs pop.
- Step-by-Step Nail Art Tutorials
Pinterest users love DIY tutorials. Create a step-by-step guide for each design, showing the materials needed, the application process, and the finished result. This format encourages users to save their pins and try the designs themselves.
FAQs
What is the hottest nail trend right now?
The hottest nail trend right now is 2026’s minimalist and geometric nail art, which continues to dominate. Clean lines, abstract shapes, and neutral tones are all the rage this year. Nail artists are also experimenting with negative space designs and negative space French tips.
Where part of the nail is left bare, offering a more modern and chic look. Metallics and holographic finishes are also popular, adding a futuristic touch to nail art.
Are paper nails better than gel nails?
Both paper nails and gel nails have their benefits, but they serve different purposes. Paper nail designs are a more budget-friendly and eco-friendly option for DIY enthusiasts, allowing for creative freedom with minimal effort. They can be applied easily at home, making them a great choice for those who love experimenting with designs without visiting a salon.
On the other hand, gel nails are known for their long-lasting wear and professional finish, but they require more time, effort, and sometimes professional help for application. Gel nails are ideal if you want something more durable and chip-resistant, while paper nails are great for short-term, creative nail art that’s easily changeable.
How to use paper forms for nails?
Using paper nail designs is simple and can add unique textures or patterns to your manicure. Here’s a quick step-by-step guide:
- Prepare Your Nails: Start by cleaning and shaping your nails. Apply a base coat to ensure a smooth surface.
- Cut the Paper: Choose a thin paper, such as tissue paper, and cut it into small pieces or desired shapes. You can also use patterned paper or even magazine clippings for more variety.
- Apply the Paper: Use a small brush or a toothpick to apply a thin layer of nail glue or clear polish onto your nail. Then, place the paper pieces on your paper nail designs, pressing gently to smooth them out.
- Seal the Design: Once the paper is in place, add a top coat to seal it. This will help the paper stick securely and give your design a glossy finish.
What is the “rich girl” nail trend?
The “rich girl” nail trend is all about luxurious, sleek, and high-end designs. Think long, almond-shaped nails with chrome finishes, diamond accents, and subtle ombré shades. Gold, silver, and pearl embellishments are often added for that extra touch of opulence.
This trend focuses on creating an overall elegant and polished look that screams luxury. It’s about making a statement with minimalistic yet chic designs that have a sophisticated vibe.
How can I create DIY paper nails at home?
Creating DIY paper nail designs at home is easy and fun! Start by selecting your favorite paper type, whether it’s tissue paper, scrapbook paper, or magazine clippings. After shaping your nails and applying a base coat, cut the paper into small pieces and place them carefully on your nails using clear nail glue.
Seal the design with a top coat to ensure long-lasting wear. The best part? You can experiment with colors, patterns, and even textures to create a unique and personalized nail look!
Can I use paper nails for special occasions?
Absolutely! Paper nail designs are versatile and can be tailored to any occasion. Whether you’re attending a wedding, a party, or a festive celebration, you can choose designs that reflect the event’s theme.
For example, you could opt for floral designs for a spring wedding, or glitter and metallic paper accents for a New Year’s Eve party. With so many design options, paper nails can elevate any outfit and make a bold statement, even for special occasions.
Do paper nails last as long as gel nails?
Paper nail designs typically don’t last as long as gel nails because they are more prone to wear and tear, especially if exposed to water or rough surfaces. However, they can last several days to a week if sealed properly with a top coat.
They’re an ideal choice for temporary nail art that you can change up based on your mood or occasion. If you’re looking for durability, gel nails would be the better option, but for creativity and variety, paper nail designs are a fun and easy alternative.
Conclusion
Paper nail designs are an exciting and accessible way to express your creativity, and in 2026, they’re more popular than ever. Whether you’re a beginner or an experienced nail artist, these stunning DIY styles allow you to transform your paper nail designs into unique pieces of art without the need for expensive salon visits.
From geometric patterns to floral prints, and even abstract collages, there’s a paper nail design for every style and occasion. Not only do these paper nail designs allow for a personalized touch, but they also reflect a growing trend toward sustainability in the beauty industry.
The best part? Paper nail art is perfect for those who love to experiment and express individuality while staying on top of trends. So, gather your materials, get inspired, and start crafting your own paper nail masterpieces today.

Witchy Nail Designs are having a moment in 2026. Whether it’s the fall season, Halloween, or any time of year when you want to channel your inner enchantress, these mystical and magical nail designs have become a go-to aesthetic for many.
From bold celestial symbols to gothic portraits and spooky, celestial vibes, witchy nail designs are no longer limited to October. Witchy Nail Designs are a year-round vibe that anyone can rock to express their unique style.
In this complete guide, we’ll dive deep into why witchy nails are perfect for 2026, the best witchy nail designs to try, DIY tutorials, and how to make your nails as magical as the season itself.
What Are Witchy Nail Designs?
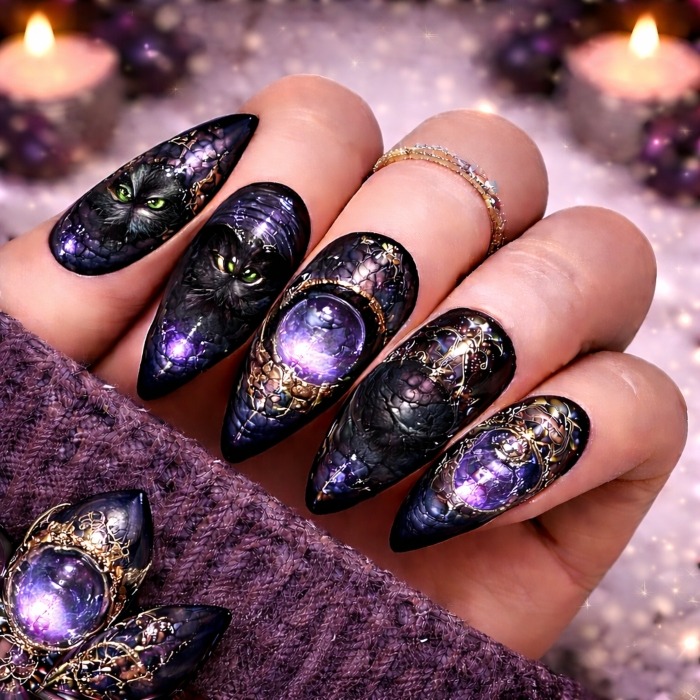
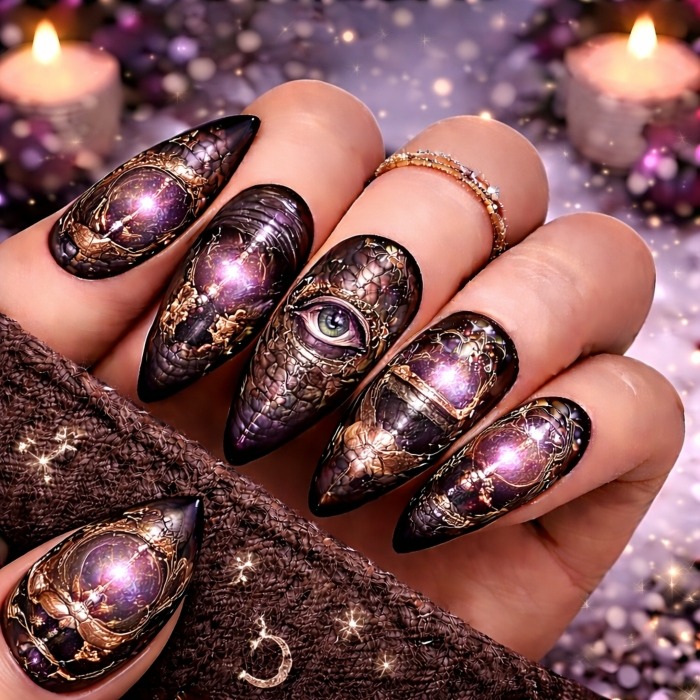
Before we get into the specific designs, let’s break down what witchy nail designs actually are. Witchy nail designs are more than just Halloween-themed designs—they are a style of nail art that draws inspiration from witchcraft, mysticism, gothic aesthetics, and magical elements. Witchy Nail Designs include a mix of dark, ethereal motifs like:
- Crescent moons and stars
- Spiders and webs
- Tarot symbols and magical glyphs
- Dark, mystical colors like black, purple, and green
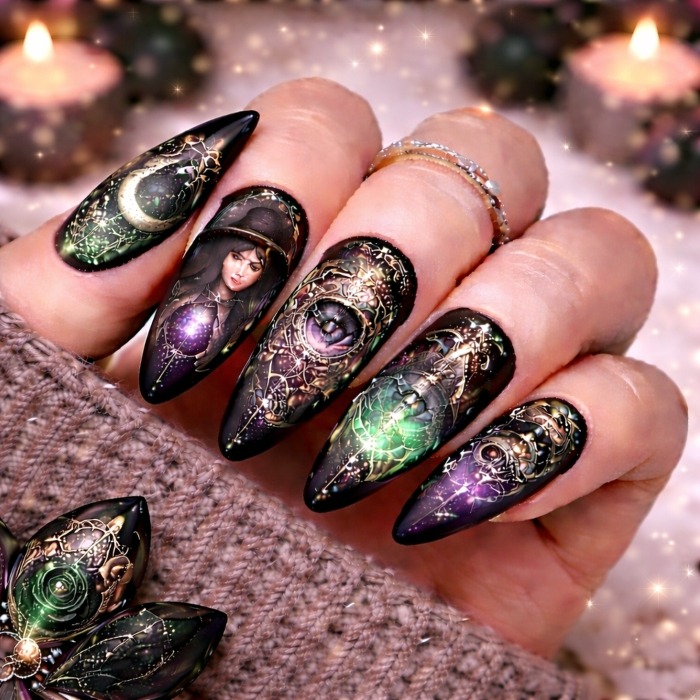
Witchy Nail Designs can be subtle or bold, with intricate details or minimalist symbols, making them versatile for different occasions and personal styles. In 2026, the witchy aesthetic has evolved, combining classic gothic vibes with modern, magical elements like celestial Witchy Nail Designs and vibrant neons, making them the perfect choice for any seasonal occasion.
Top Witchy Nail Designs for 2026
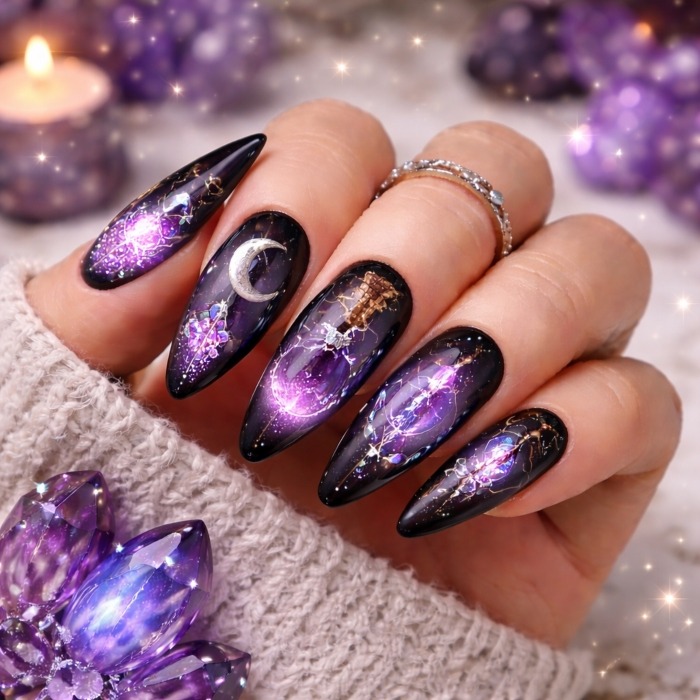
1. Celestial Moon & Stars Nails
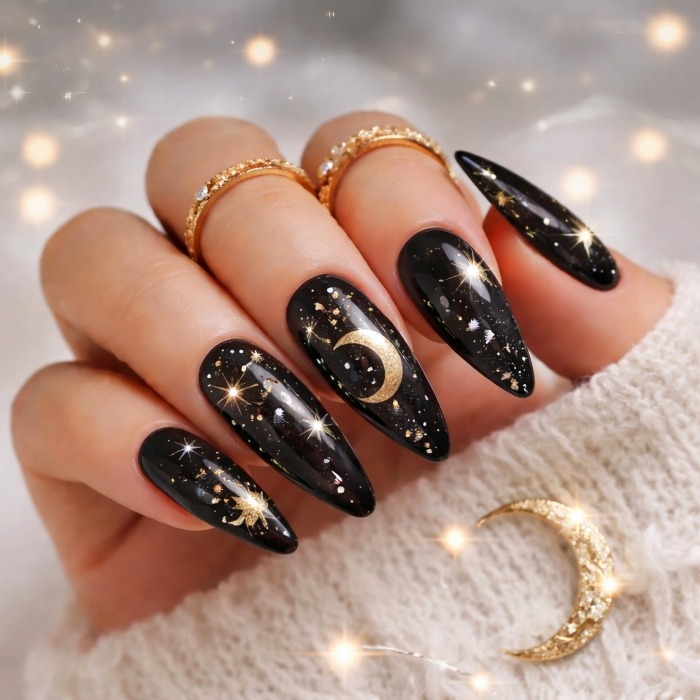
A deep black base paired with golden crescent moons and sparkling stars scattered across the nails. Witchy Nail Designs capture the magic of the night sky, perfect for anyone looking to bring mystical energy into their nails. Simple yet mesmerizing, this design works well for both casual and festive occasions.
2. Poison Green Potion Nails
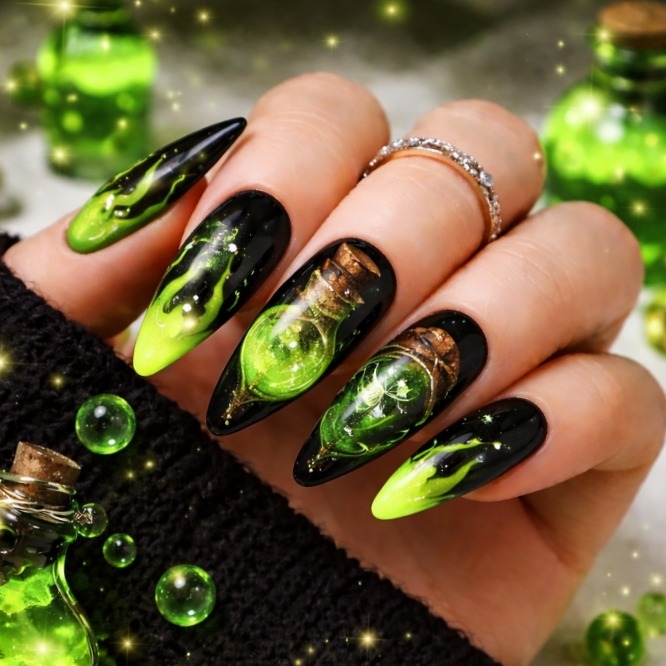
Neon green flames and potion bottles in vibrant hues with a dark background create a bold and spooky look. Witchy Nail Designs evoke a sense of mystical danger and magic, perfect for a witchy Halloween vibe or anytime you want your nails to look otherworldly.
3. Pastel Goth Witch Nails
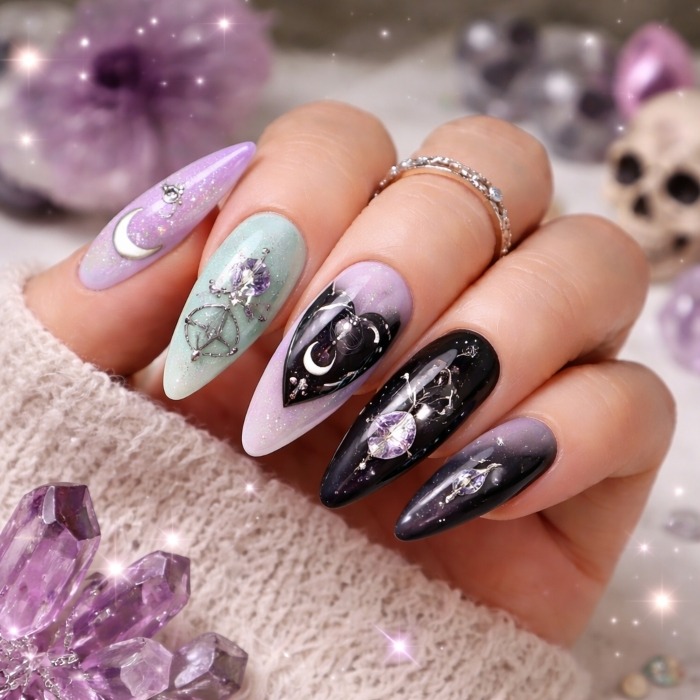
A beautiful combination of soft pastel shades like lavender, mint green, and pale pink, with delicate witchy symbols like pentagrams and crystals. Witchy Nail Designs blend gothic vibes with subtle witchy elements, making it a great choice for those who prefer a more elegant yet mysterious look.
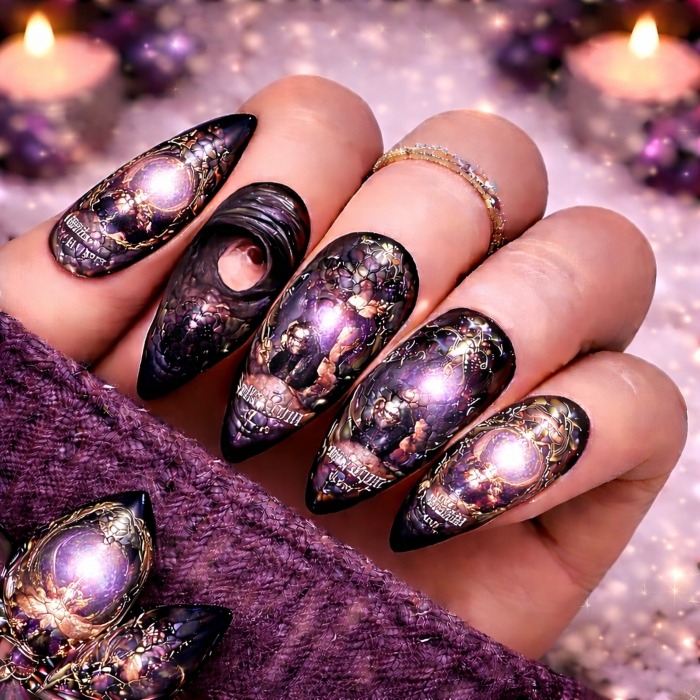
4. Full Moon Witch Nails
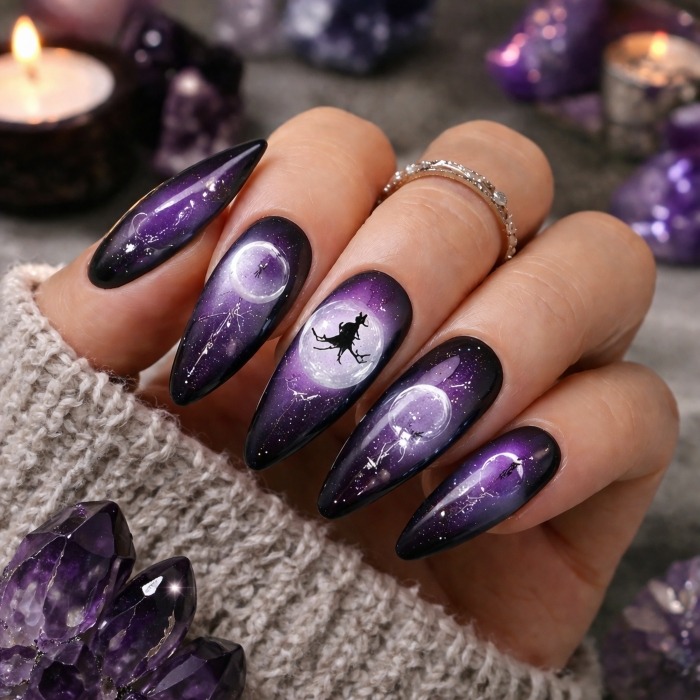
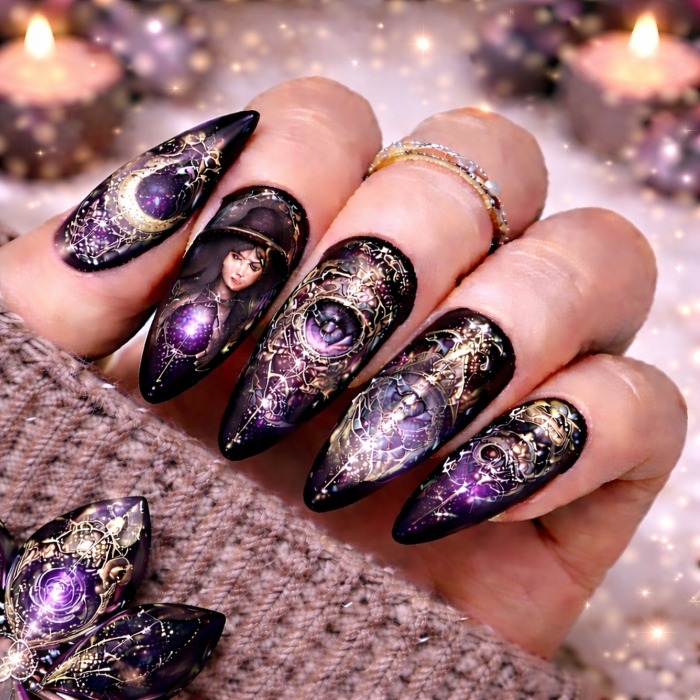
Full moon designs in the center of each nail, set against a dark purple or black background. Witchy Nail Designs evoke a sense of witchcraft and mysticism, perfect for those who want a bold, celestial-themed look to complement their witchy aesthetic.
5. Witch’s Broomstick Nails
These nails feature tiny golden broomsticks painted on a dark brown base, symbolizing classic witchy motifs. Paired with subtle sparkles or moon symbols, Witchy Nail Designs create a playful, charming witchy vibe, great for adding a touch of whimsy to your look.
6. Spider Web Nails
Black nails with white spider webs on the tips or Witchy Nail Designs. Add tiny spiders to complete the design, making this a spooky yet stylish witchy nail look. Perfect for Halloween or any season when you want to embrace your dark side.
7. Creepy Eyes Nails
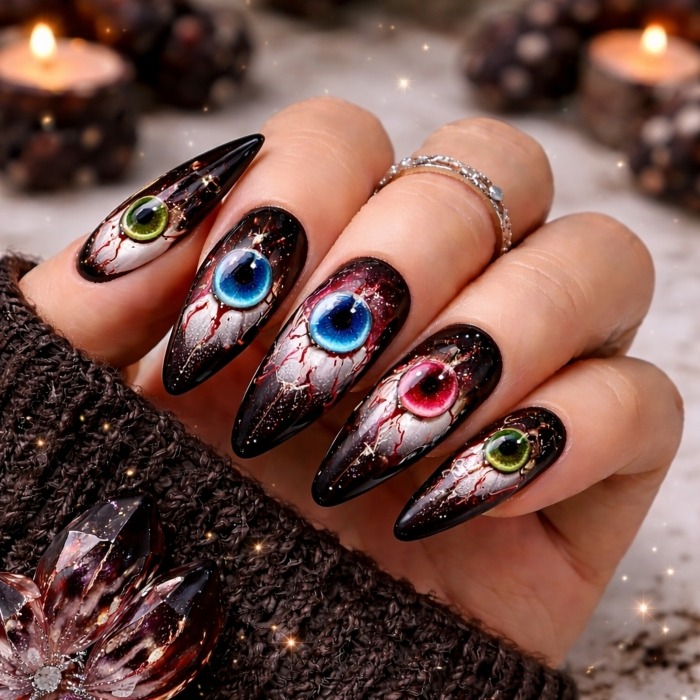
Bold eye designs featuring evil eyes, all-seeing eyes, or mystical gazes painted on black, red, or purple nails. Witchy Nail Designs are dramatic, powerful, and perfect for anyone who wants to make a statement with their witchy nails.
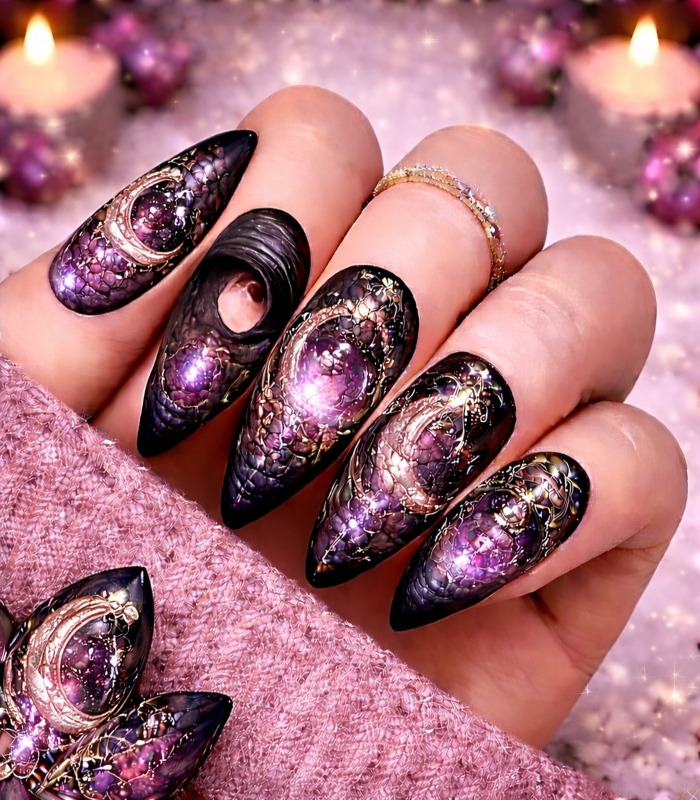
8. Crystal Witch Nails
Painted with amethyst, rose quartz, and other crystal designs, Witchy Nail Designs use subtle pastel tones and geometric shapes to reflect the healing properties of crystals. This design is perfect for those who love both witchcraft and spiritual wellness.
9. Witchcraft Symbols on Short Nails
Minimalist witchcraft symbols like pentagrams, Witchy Nail Designs, and magical glyphs on short nails. With a nude base or subtle black accents, this design adds a witchy touch without going overboard—ideal for a more understated look.
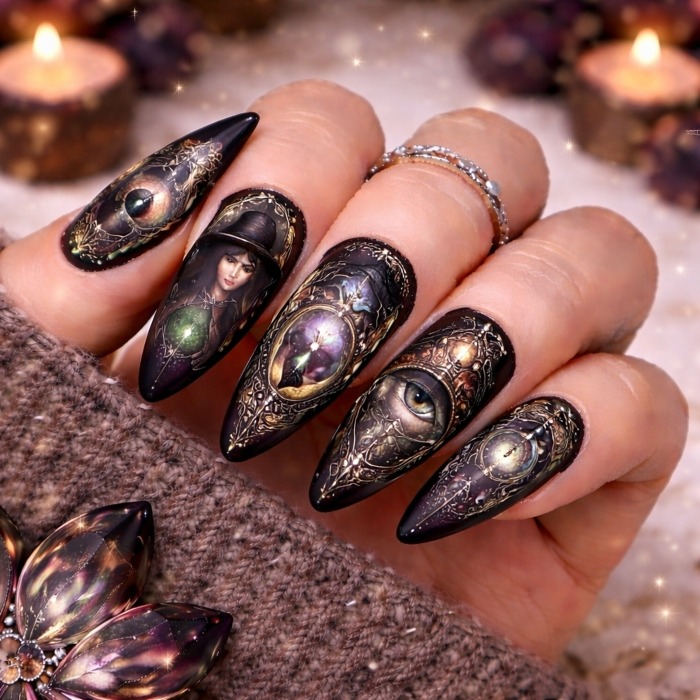
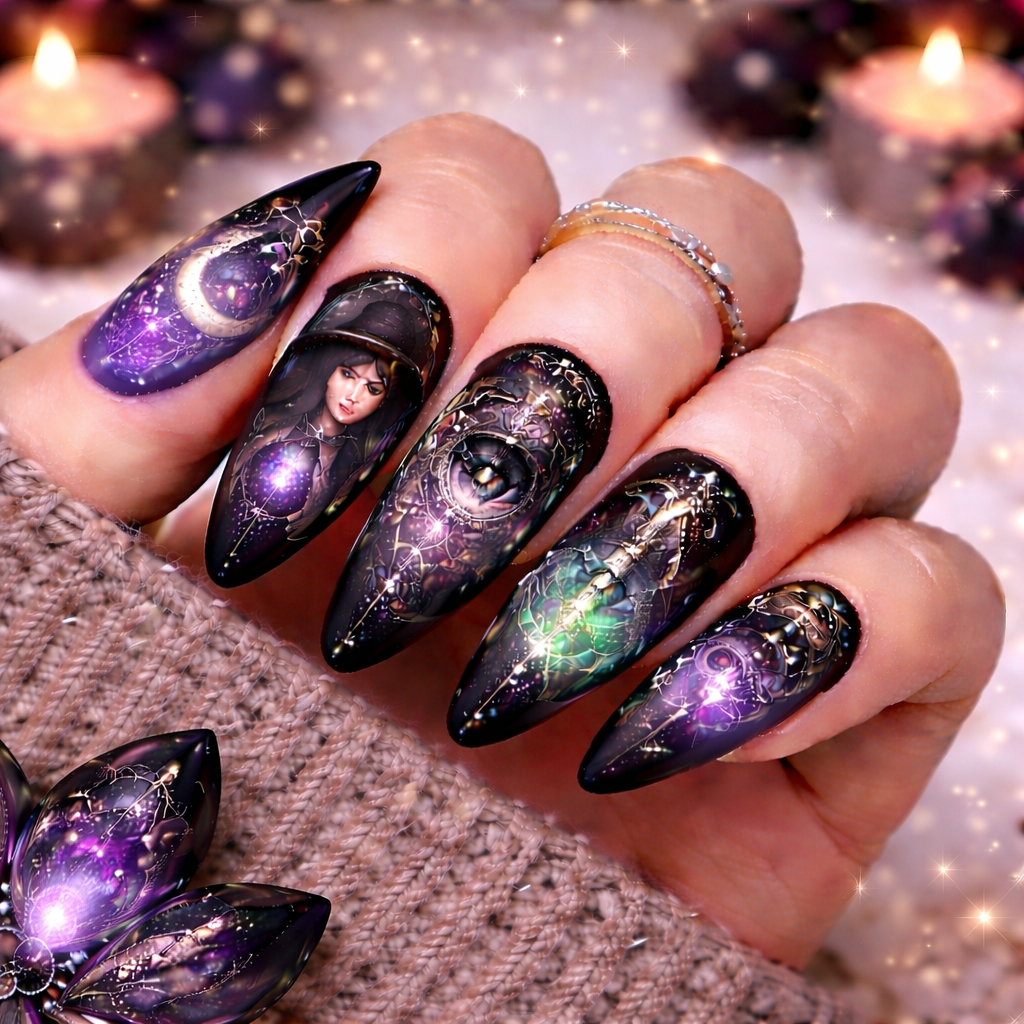
10. Gothic Witch Portraits
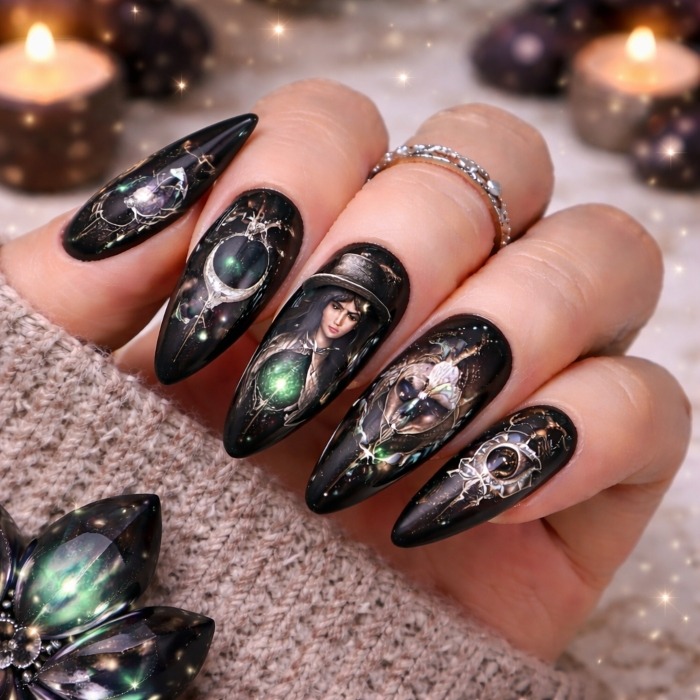
A dramatic stiletto nail design featuring gothic portraits of witches, with intricate dark makeup, moonlit backgrounds, and other mysterious imagery. Witchy Nail Designs are bold and empowering, perfect for those who want to embrace the dark goddess energy.
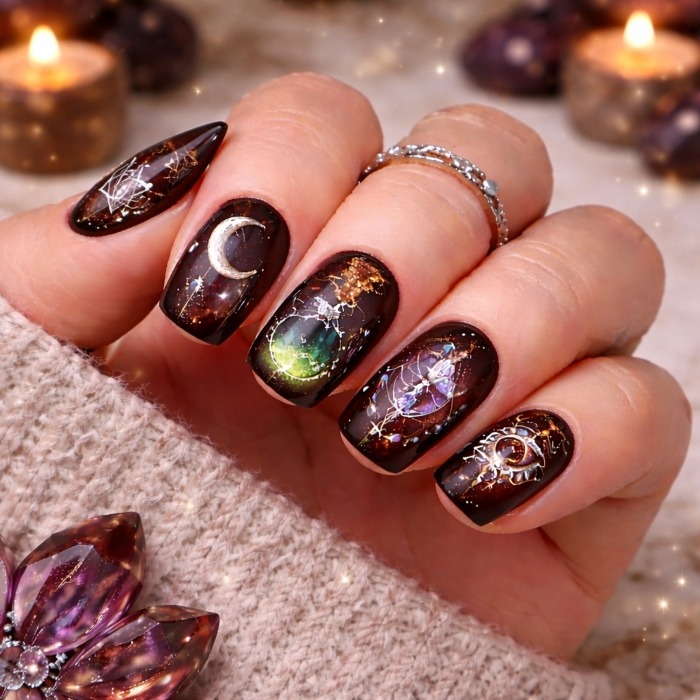
11. Witchy Eye and Moon Nails
Eye symbols paired with crescent moons in shimmering gold or silver accents on a black or dark purple base. Witchy Nail Designs invoke both mysticism and celestial magic, making it perfect for witchy individuals who also love the night sky.
12. Witchcraft Tarot Cards Nails
Tarot card designs featuring symbols like The Moon, The Devil, and The High Priestess are painted on each nail. Witchy Nail Designs draw inspiration from witchcraft and divination, making it a must-try for those fascinated with spirituality and the occult.
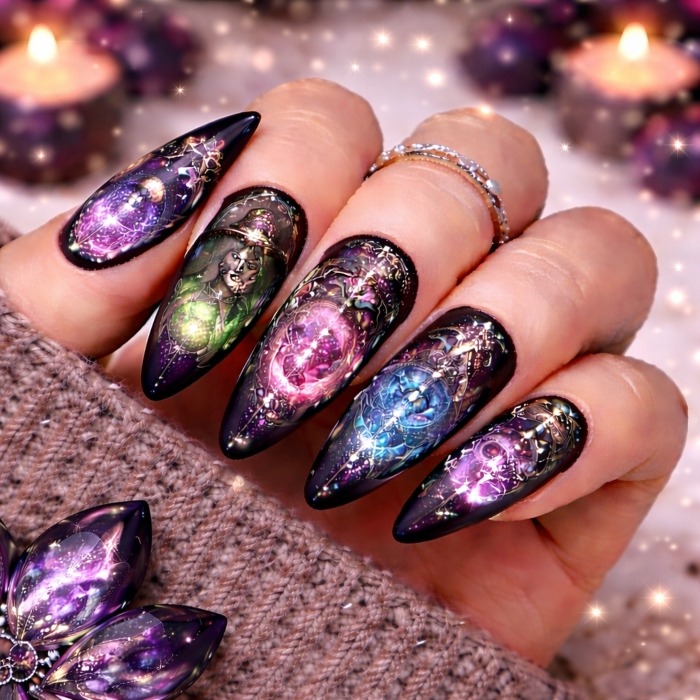
13. Cosmic Witch Nails

Inspired by the stars, planets, and the cosmos, this design features deep purples, blues, and blacks with celestial designs. Perfect for space enthusiasts who want to combine witchy vibes with cosmic energy.
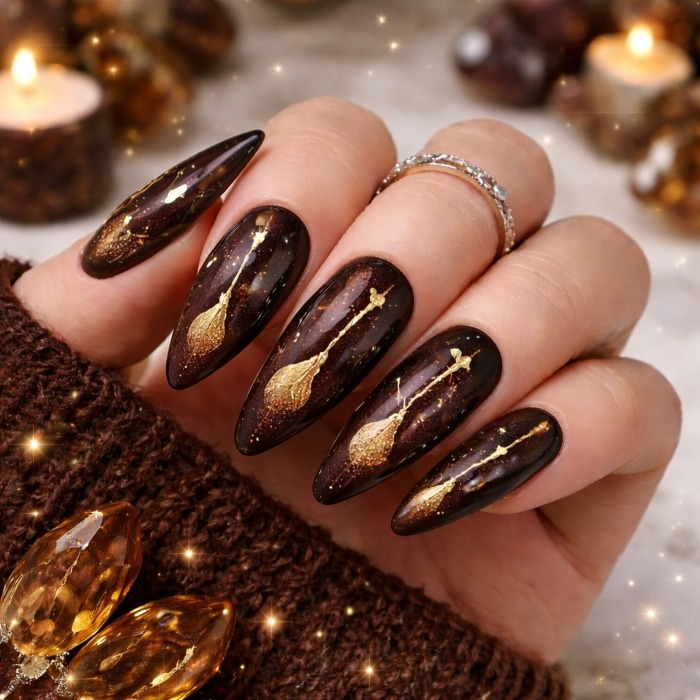
14. Witch’s Potion Bottle Nails
Featuring tiny potion bottles, cauldrons, and magical elixirs, this design uses vibrant colors like green, purple, and orange for a more spooky effect. Witchy Nail Designs are fun and filled with mystical power, perfect for spooky events.
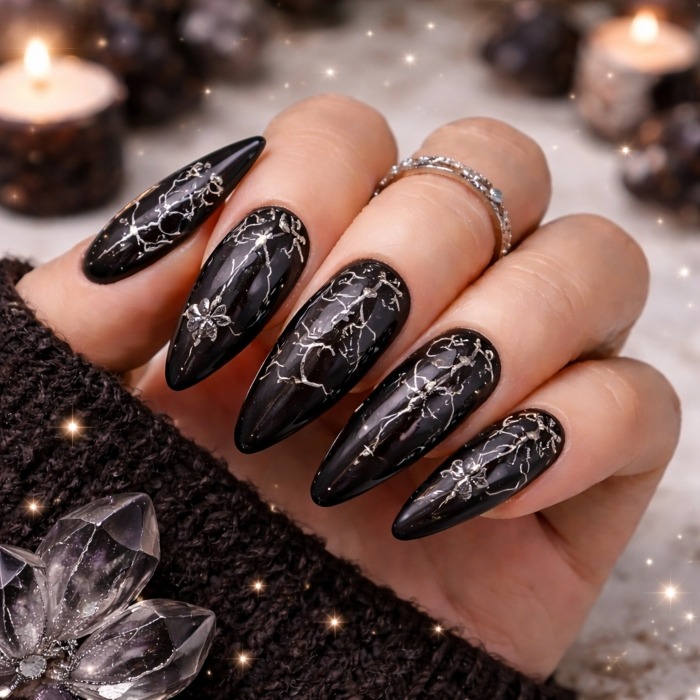
15. Black Rose Witch Nails
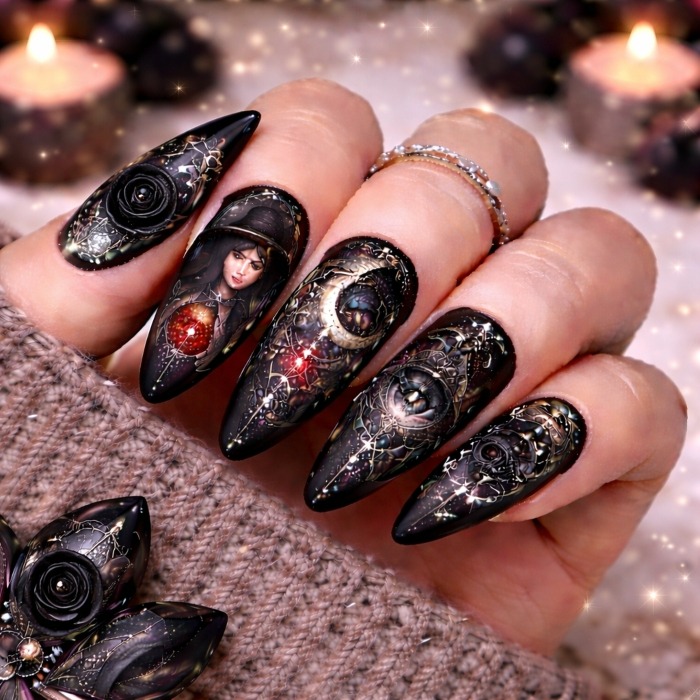
Black roses or dark floral motifs painted on black Witchy Nail Designs with gold or silver accents. This design evokes a gothic, witchy vibe, perfect for those who want a touch of dark romance while keeping their nails chic.
16. Faded Witchy Gradient Nails
An ombre-style fade from black to orange with small witchy symbols like crystals, moons, or bats scattered throughout. Witchy Nail Designs are perfect for someone who loves bold colors but wants to keep it mysterious and magical.
17. Celtic Witch Designs
Intricate Celtic knots, runes, and symbols drawn on a neutral base with subtle gold or silver accents. Witchy Nail Designs are perfect for those who enjoy ancient witchcraft and want a blend of mysticism and history.
18. Glam Witch Nails
A sparkling base with witchy symbols like stars, pentagrams, or moons outlined in gold or silver. Witchy Nail Designs add a glamorous twist to the classic witchy look, making it great for those who love both shine and witchcraft.
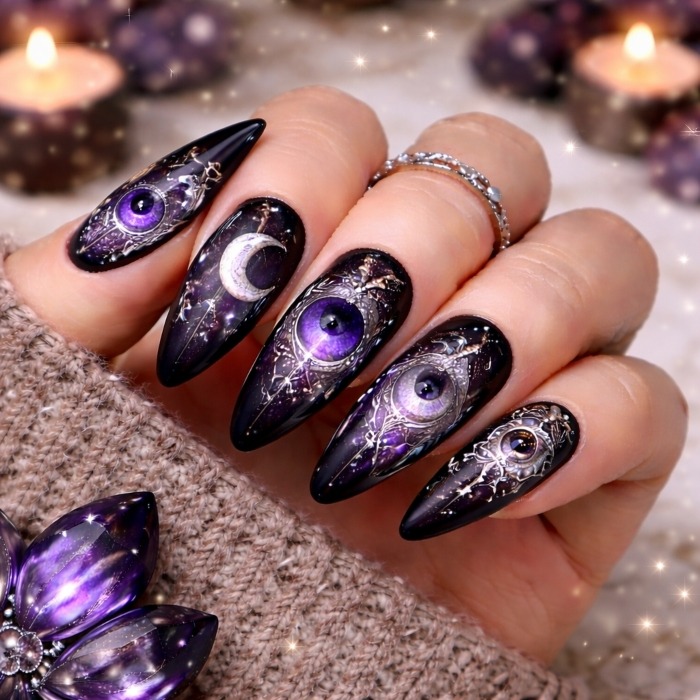
19. Mystic Eye Witch Nails
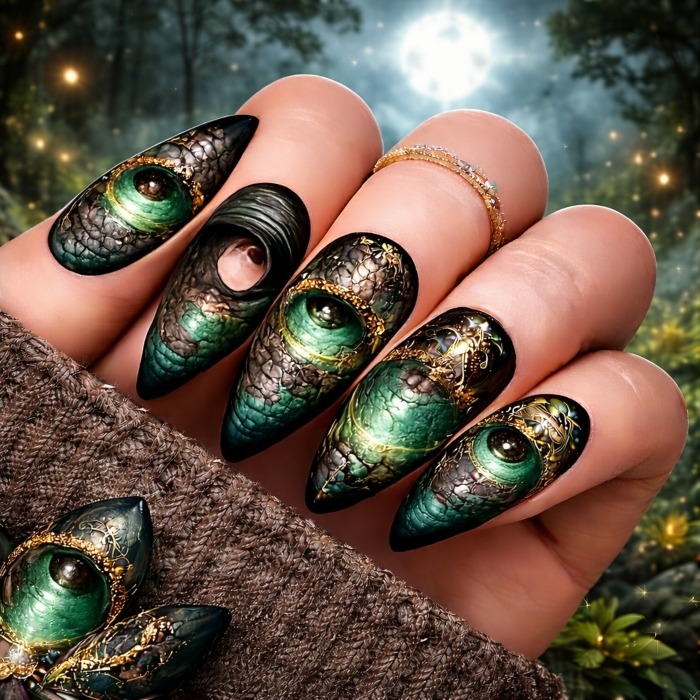
A large eye design is painted on each nail in vibrant colors, featuring golden accents or fine details. This design is bold, mystical, and perfect for anyone who loves esoteric symbolism and wants to make a statement.
20. Witchy Spider Web Nails
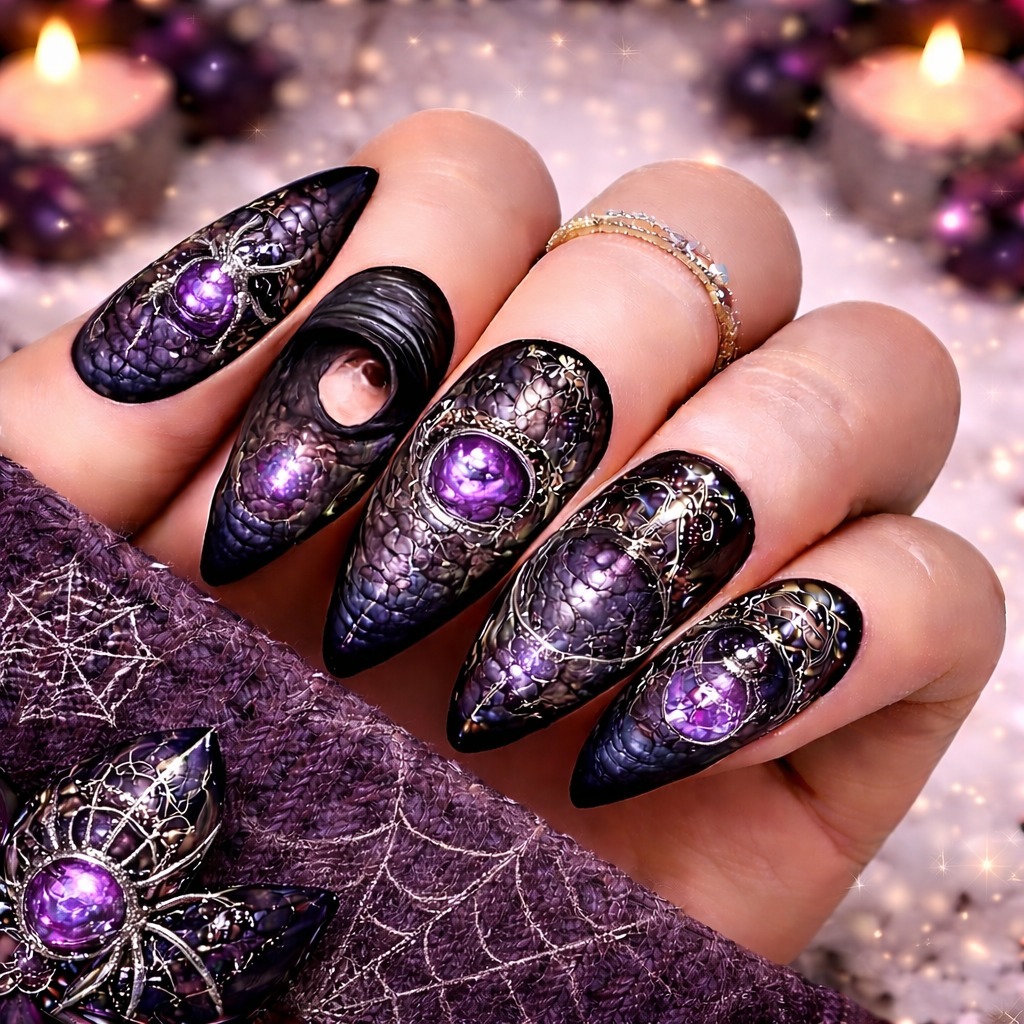
Spider webs painted with thin lines on black or white nails, with tiny spiders perched on them. This spooky yet stylish design is perfect for adding a little Halloween charm to your nails.
21. Witch’s Familiar Cat Nails
A cute black cat design on nails with tiny moons and magical symbols. This design brings the witchy familiar into the spotlight, adding a fun, cute, and spooky touch to your nails.
22. Dark Moon Crescent Nails
Crescent moons painted in gold or silver on a dark purple background, with tiny stars sprinkled around. This elegant yet mysterious design is perfect for anyone who loves celestial witchy vibes with a subtle touch.
23. Witchy Tarot Card Nails
Tarot card-themed nails, with each card representing a different witchy or mystical symbol. Designs may include The Moon, The Fool, or Death card—each nailed to one of the fingers for a complete divination-inspired look.
24. Moonlit Witch Nails
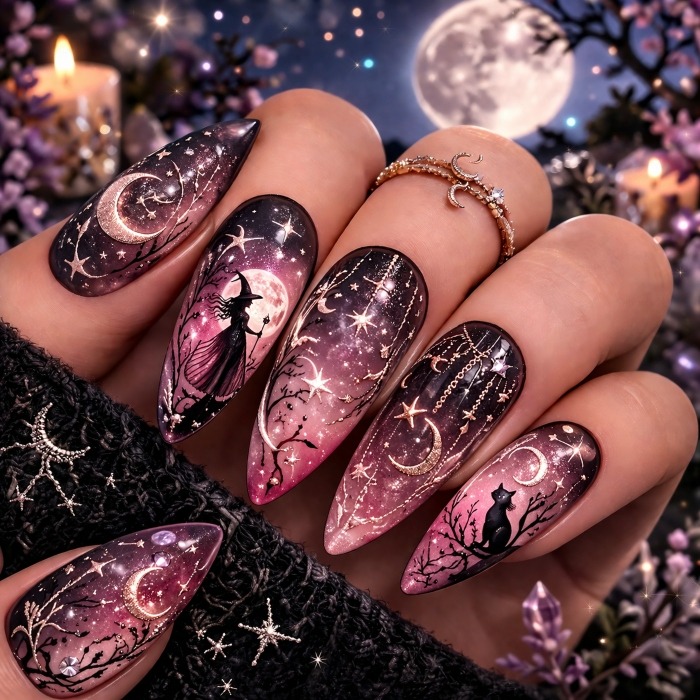
A moonlit sky with silhouettes of witches flying across purple gradients and starry accents. This design channels a whimsical and romantic witch vibe, perfect for nighttime wear.
25. Witchy Spellbook Nails
Tiny spellbook illustrations painted on deep green or black nails. You can also add ancient symbols and magical runes to complete the mystical look.
Why Witchy Nail Designs Are Perfect for 2026
Nail Trends 2026
Witchy nail designs are trending in 2026 because they perfectly align with the 2026 nail trends that emphasize bold, expressive designs. In recent years, nails have become more of a canvas for self-expression. People are not afraid to show off their unique personalities with trendy colors, intricate designs, and fun motifs.
In 2026, Witchy Nail Designs are an ideal fit because they allow nail artists to blend dark, mystical elements with modern trends. For example, celestial designs, like moons and stars, are hugely popular, and witchy nails feature these elements in a way that’s fresh, edgy, and full of mystical energy.
Seasonal Relevance
While witchy nails are perfect for Halloween, they’re also timeless and perfect for any season, especially fall. The spooky aesthetic and celestial energy of witchy nails align with the darker, mysterious vibe of the autumn months. As the season changes, these designs bring a magical touch that complements fall colors, cozy vibes, and pumpkin-spiced everything.
FAQs
What Color Are Witches’ Nails?
Witches’ nails are often associated with mysticism and magic. Black nails symbolize connection to the dark arts and protection. Purple represents spiritual strength and intuition, while green is linked to growth and healing. Silver nails are often used for moon magic and celestial energy.
What Are Rich Girl Nails?
Rich girl nails are characterized by elegance and luxury, often featuring neutral colors like nude, soft pinks, or French tips. These designs focus on simple sophistication, with accents like chrome or gold to add a premium feel. They convey wealth and high fashion in a subtle way.
What Do Nails Represent in Witchcraft?
In witchcraft, nails represent personal power and protection. Black nails are used to banish negative energy, while designs like crescent moons or crystals channel spiritual strength. They are also seen as tools for intention-setting, with each design enhancing different types of magic or personal energy.
What Are the Most Seductive Nail Colors?
The most seductive nail colors include red, which symbolizes passion and desire, and deep burgundy, representing mystery and confidence. Black nails add an air of mystical strength, while metallics like gold and chrome convey luxury and elegance, enhancing the alluring appeal.
Conclusion
Witchy nails are not just a passing trend; in 2026, they have become a timeless and magical aesthetic that anyone can embrace throughout the year. Whether you’re channeling your inner witch for Halloween, the fall season, or just love mystical designs, these nails offer a way to express your personal style with bold celestial symbols, gothic elements, and spooky motifs.
From neon green potion nails to full moon designs, there’s a witchy nail design for everyone. The combination of dark, mystical elements with modern trends makes witchy nails the perfect go-to look for 2026. These designs are ideal for creating seasonal magic and adding a bit of mysticism to any occasion.
So, whether you are looking to create a bold statement or prefer a more subtle witchy aesthetic, this complete guide provides all the inspiration you need to perfect your witchy nails. Embrace the spiritual energy, empowerment, and mystical vibes that witchy nails bring, and let your nails become the canvas for magic this season!

 Spring Nail Designs3 weeks ago
25 Witchy Nail Designs for 2026 You Must Try This Season
- Spring Nail Shapes3 weeks ago
Top 15 Cat Eye & Chrome Nails 2026: Trendy Styles You Need to Try!
- DIY Spring Nails2 weeks ago
21 Cute July Nail Ideas 2026 for a Fresh Summer Vibe
- Spring Nail Shapes3 weeks ago
19 Cute Green French Nail Tips Perfect for Spring 2026
- DIY Spring Nails3 weeks ago
25 Must-Try Summer Gel Nails Ideas You Can’t Miss in 2026
- Spring Nail Designs3 weeks ago
16 Stunning Paper Nail Designs 2026: Easy DIY Styles to Try at Home
- Spring Nail Shapes2 weeks ago
18 Almond Shaped Nails Ideas for the Perfect Spring Manicure 2026
- Spring Nail Designs2 weeks ago
15 Memorial Day Nail Mistakes You Must Avoid in 2026 for a Flawless Look